This post may contain affiliate links. Please see our disclosure policy.
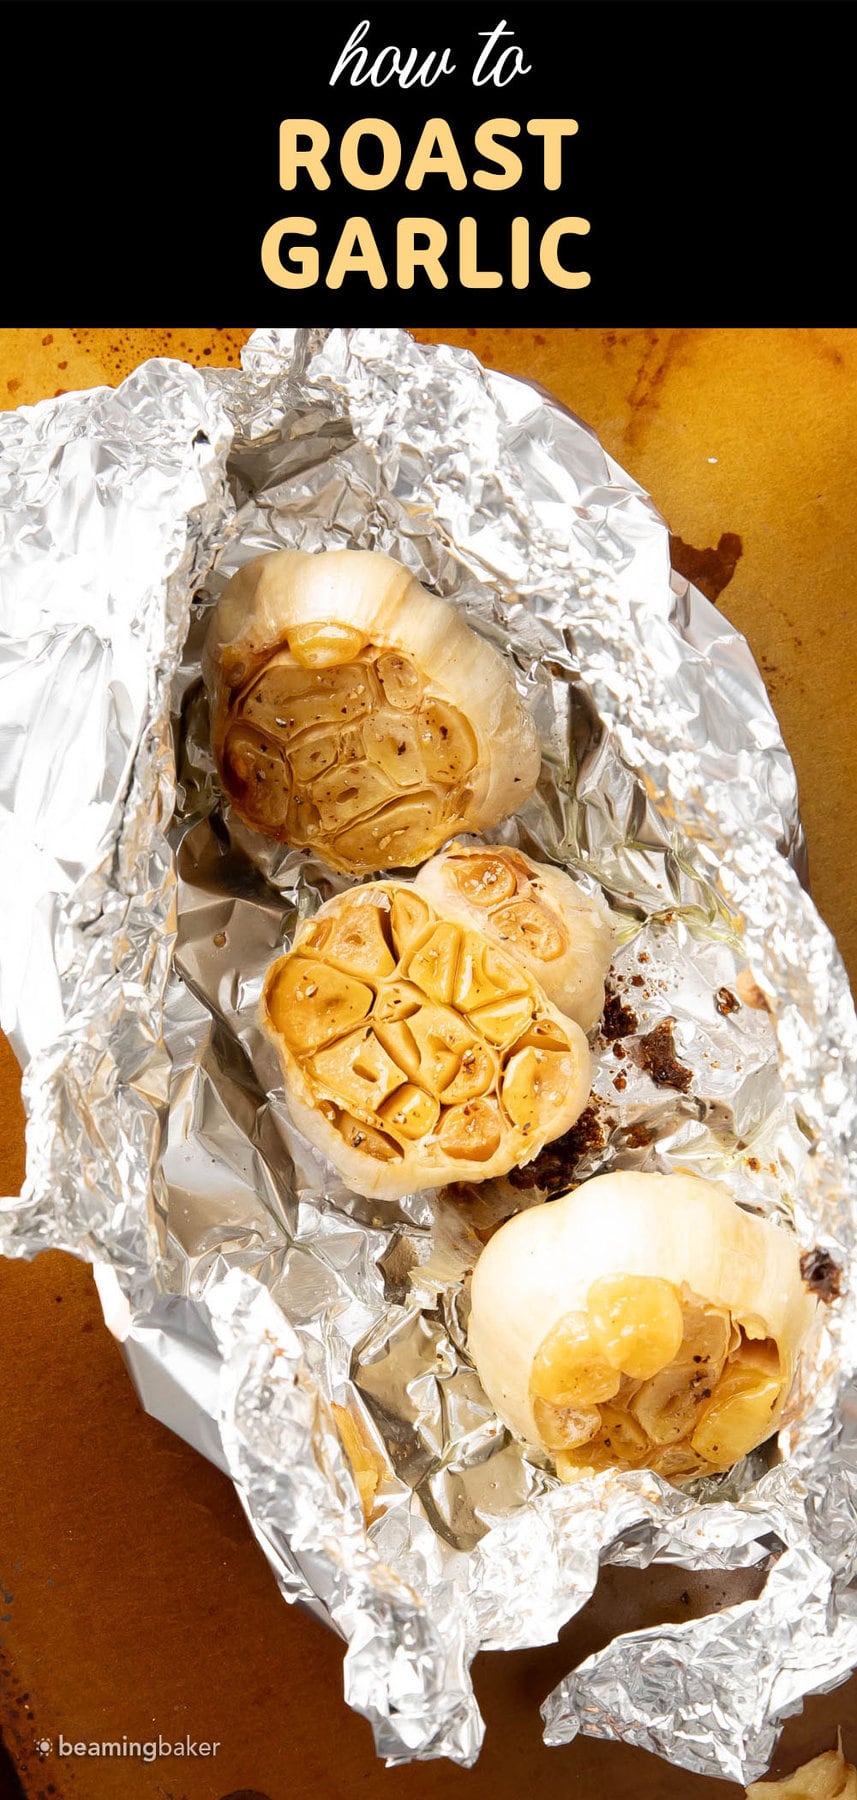
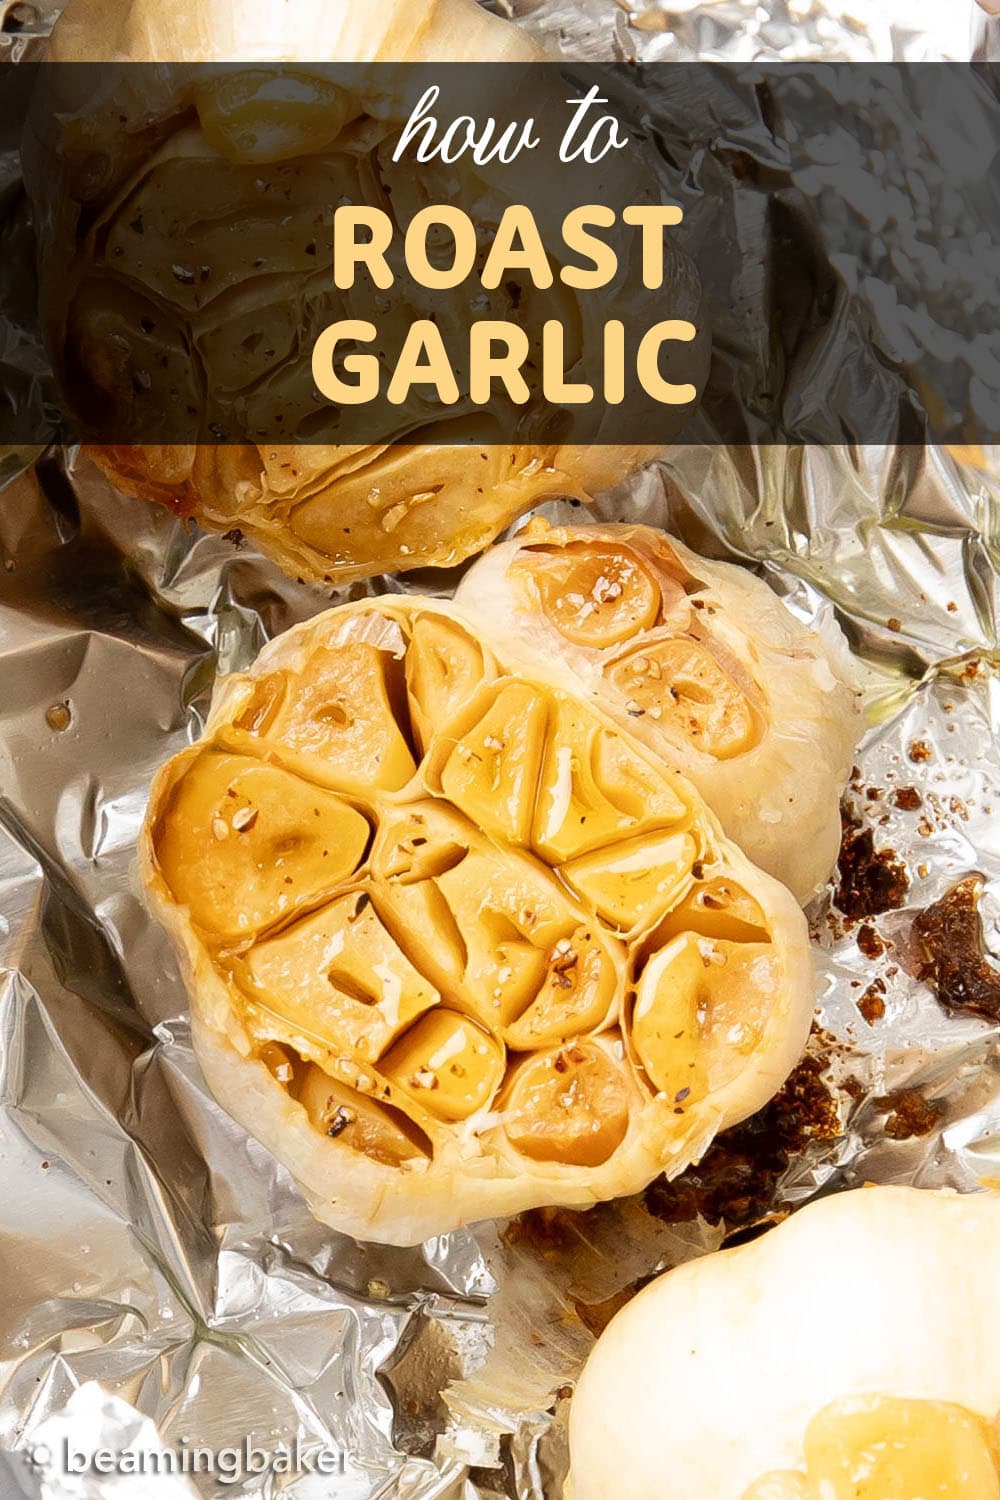
Learn how to roast garlic the easy way for creamy, rich garlic that’s lightly caramelized and just a hint of sweet. You’ll want to spread and top it on everything, from toast to pasta, soups, more!

How to Make Roasted Garlic – the Tasty Way
Have you ever walked down the street and immediately felt your mouth water whilst hit by the deliciously pungent and aromatic scent of roasted garlic? Well, you’re in for a treat today, as we’re learning how to roast garlic!
Think about the heavenly, just-right caramelized edges, creamy, soft centers, and slightly sweet taste of roasted garlic. With just 3 ingredients and a few minutes of prep, you’re well on your way to enjoying the best ever roasted garlic!
Ingredients for Roasting Garlic
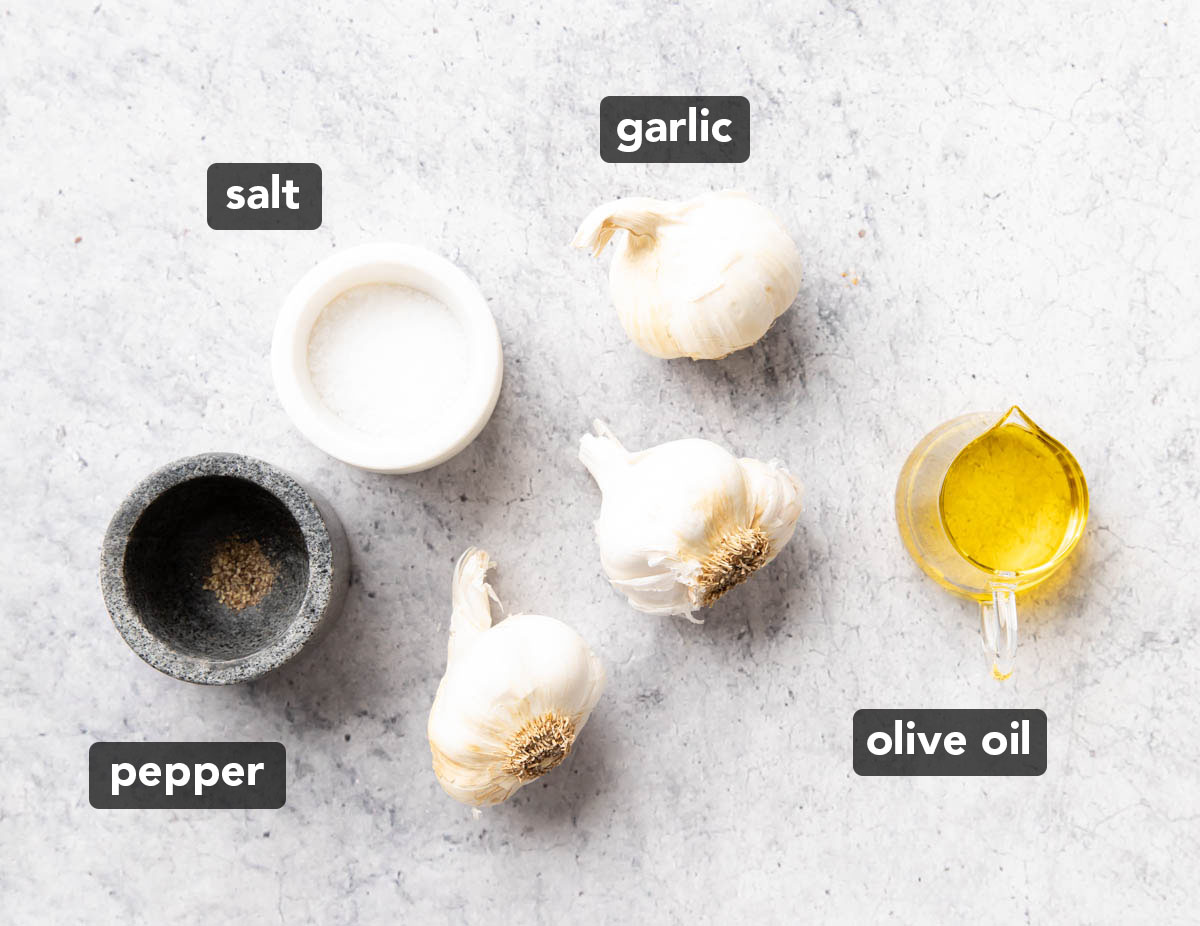
All you need are 3 simple ingredients for today’s course on how to roast garlic! These simple ingredients combine to make the easy and elegant perfection that is roasted garlic.
- Garlic – you’ll be using heads of garlic to make roasted garlic faster than doing them in individual cloves.
- Extra Virgin Olive Oil – I like to use extra virgin olive oil for its heart-healthy properties and antioxidants and vitamins.
- Salt and pepper – you can add this to taste—more for saltier and spicier, less for a milder flavor. Once you learn this base roasted garlic recipe, you can get sassy and add in ingredients like thyme, chili peppers and more!
How to Roast Garlic
Once you learn how to roast garlic, you’ll wonder why you didn’t do it sooner! Here are the easy steps to roast garlic in the oven, with a photo tutorial. Be sure to check out the recipe card at the bottom of this post for exact measurements and timing instructions.
Preheat & Peel Garlic
First, preheat the oven to 400°F. Then, peel off just enough of the papery skin off each garlic head. Be sure to keep enough to keep the heads intact.
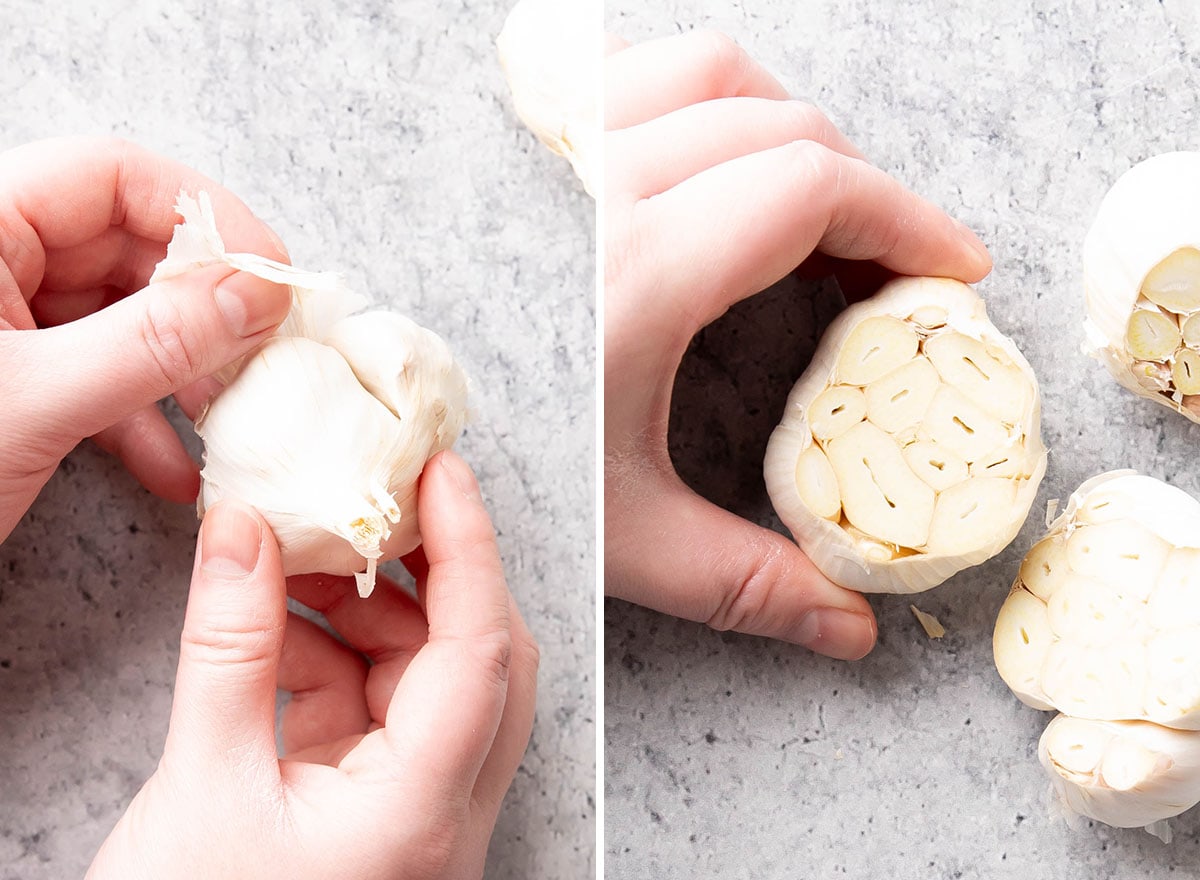
Trim the Heads
Next, you’ll use a knife to trim off about ¼ to ½” off the top of each garlic head.
Trim off enough to expose each garlic clove to ensure an even roast.
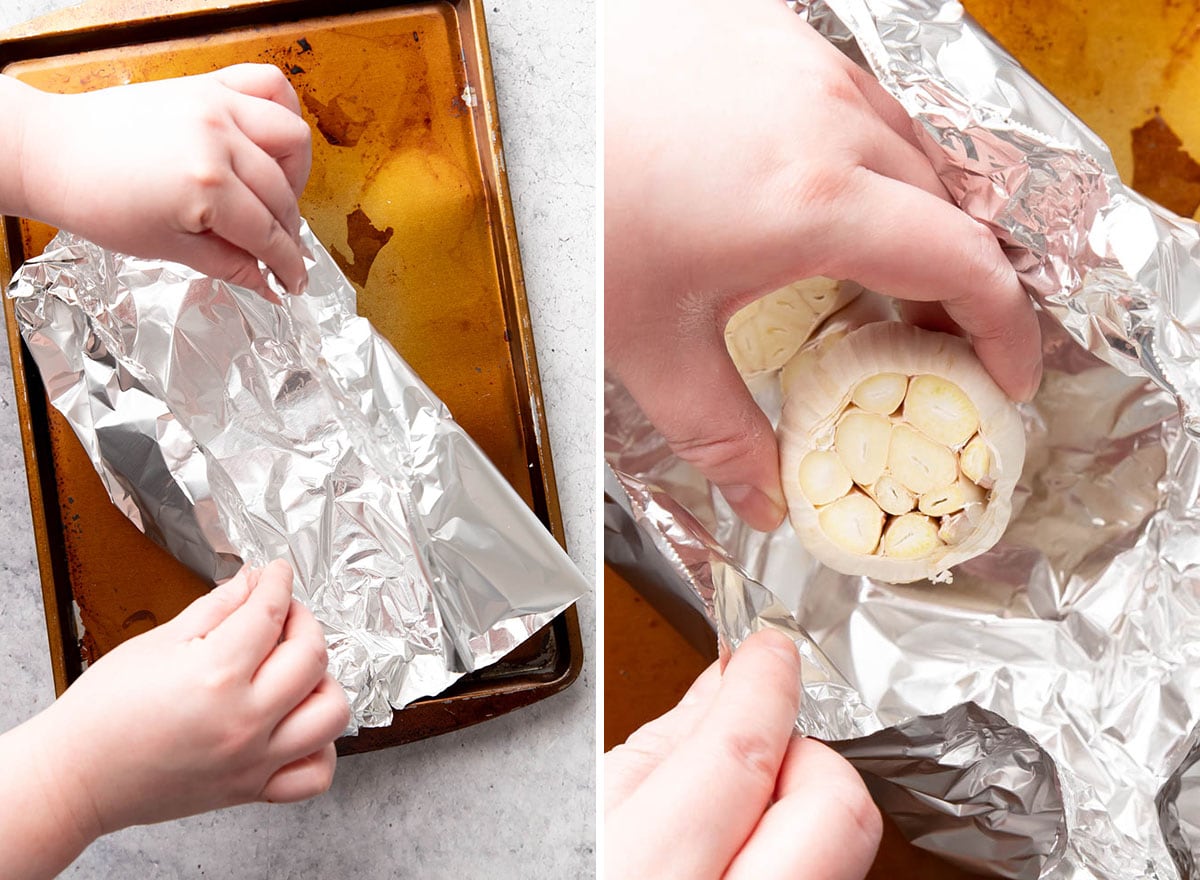
Create a Foil Pouch to Roast the Garlic in the Oven
Now, grab a large sheet of foil and press the edges upward to create a “boat”on a baking sheet. Be sure to leave overhang—this will be joined to create a pouch later.
Then, place the garlic heads into the boat.
Drizzle Garlic with Olive Oil and Spices
Next, drizzle the tops of each head of garlic with olive oil. Using your finger, spread and rub the oil into the cloves.
Then, sprinkle each head with salt and pepper to taste.
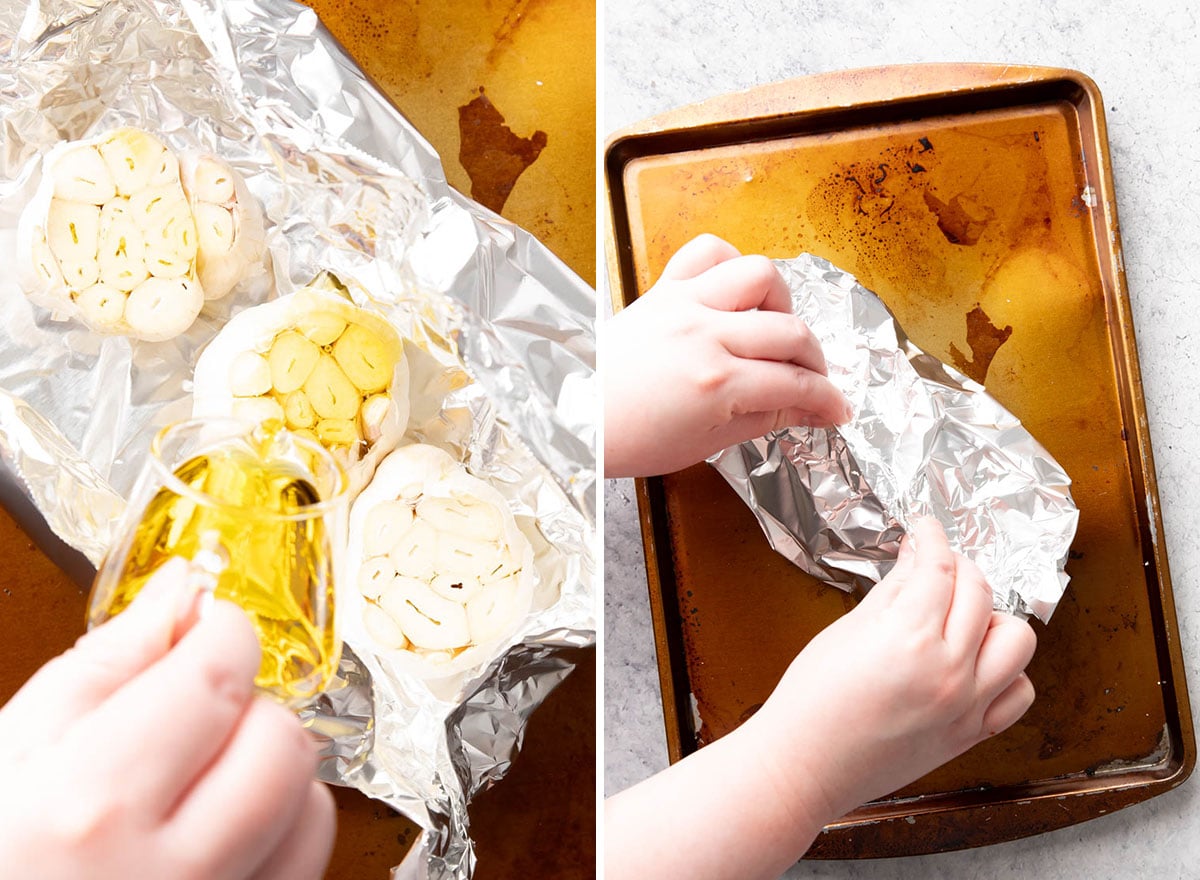
Close the Foil Pouch
Grab the two ends of foil overhang and pinch them together, closing the foil pouch.
Make sure to curve the foil around the garlic heads to avoid sticking during roasting.
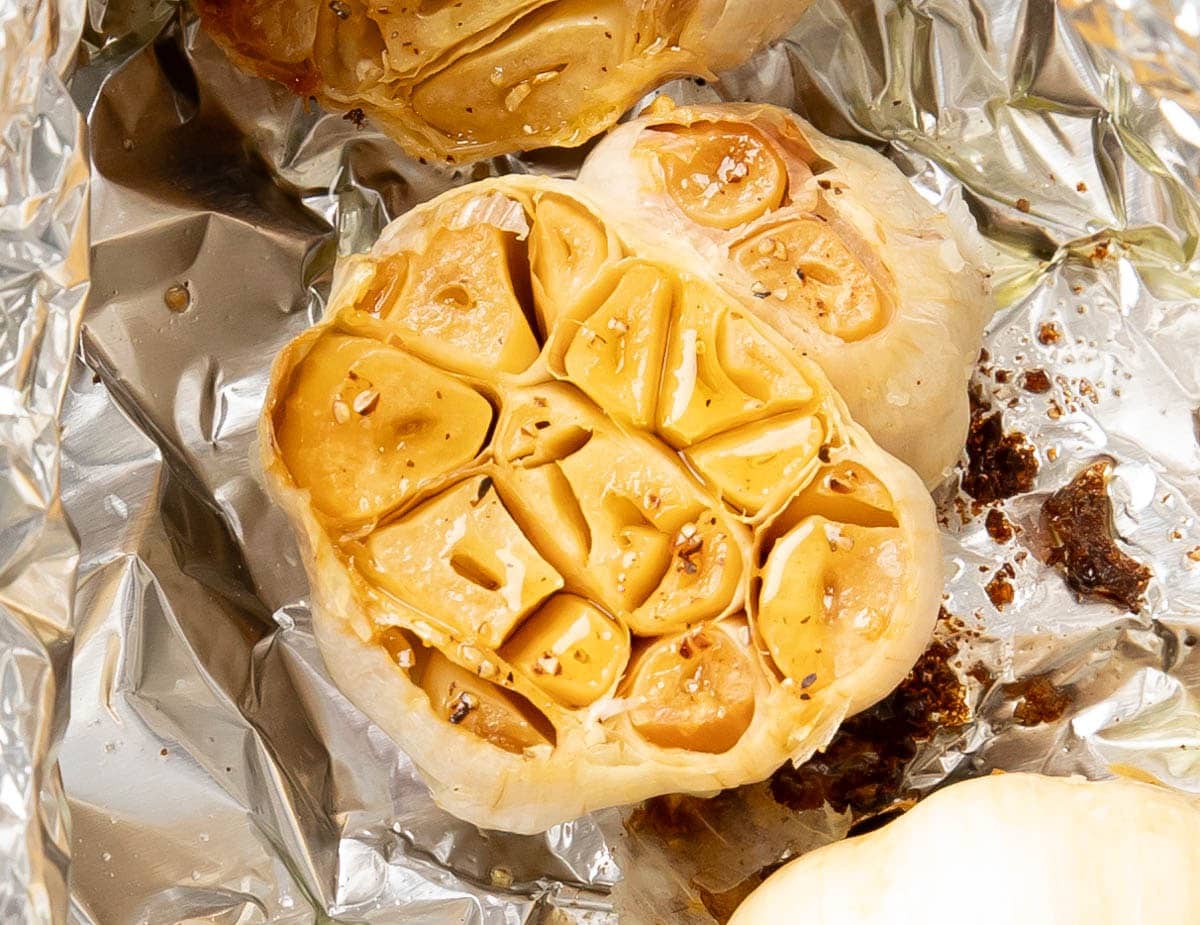
Roast the Garlic
Carefully place the baking sheet into the oven. Bake for 45-65 minutes, until golden.
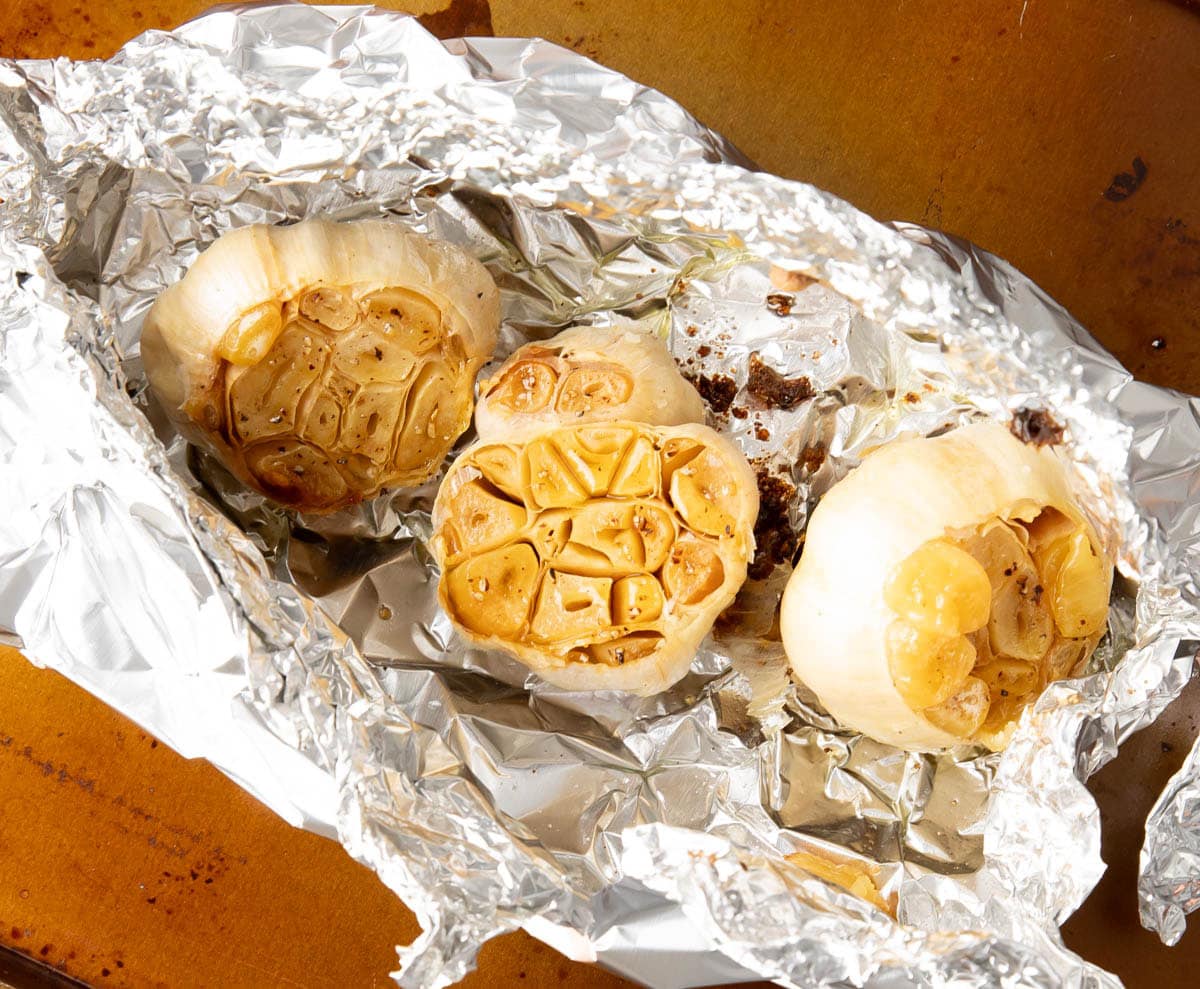
Open, Trim, and Enjoy Roasted Garlic!
Once done roasting, retrieve the baking sheet from the oven. Carefully open the foil pouch to avoid a steam burn.
Then, trim the edges of the papery skin to create an opening to scoop out the roasted garlic.
I hope you love learning how to roast garlic! Be sure to comment below and let me know what you think—it truly helps out so much!
Q&A
- How Long to Roast Garlic? Determining how long to roast garlic depends on the temperature and quantity. In this recipe, I’ll cover roasting garlic at 400°F. See questions below for details on different temperatures.
- How to Roast Garlic in the Oven? Peel off the papery skin of garlic heads, trim off the tops, and drizzle/spread olive oil onto the tops and sprinkle with seasonings. Then, roast until golden. Be sure to check out the recipe card for details!
- How to roast garlic in an Air Fryer? To roast garlic in an air fryer, remove just enough papery skin off the garlic heads to keep it intact, then trim off the tops of the heads. Then, drizzle and coat the exposed cloves with olive oil, salt and pepper. Wrap each head in a rounded pouch avoiding contact with the foil. Set the air fryer to 390°F and roast for 20-30 minutes, or until golden. Be sure to check to avoid burning.
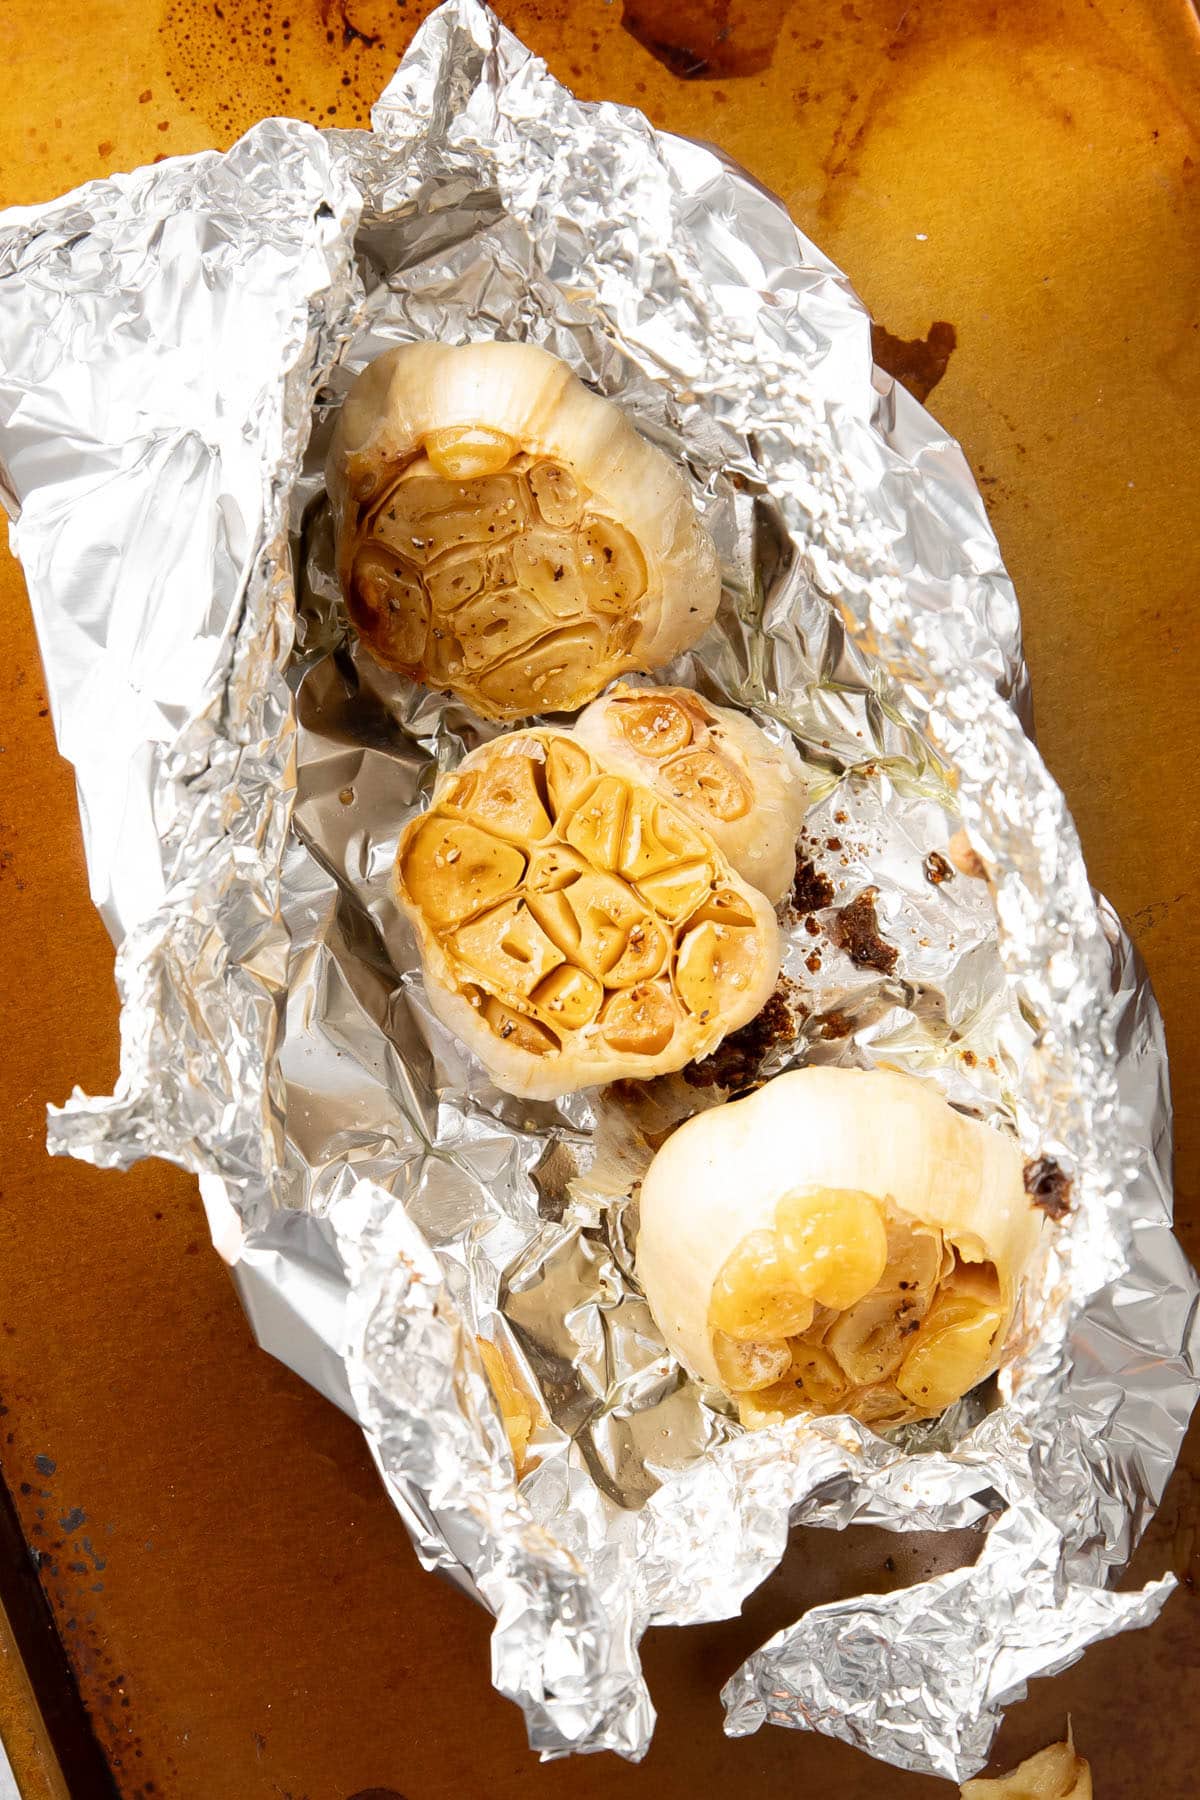
How to Store Roasted Garlic
You might not want to eat all 3 heads of roasted garlic all at once (you do you). Here are a few ways to store roasted garlic, depending on how long you want to keep it.
Store Roasted Garlic for a Few Days
To store roasted garlic for up to 3 days, simply place whole heads of roasted garlic in a resealable container in the refrigerator.
Or, Store Roasted Garlic for a Few Weeks
Place roasted garlic heads into an airtight, sealable container. Cover completely in oil to preserve. Then, seal tightly and store in the refrigerator for up to 2 weeks.
Storing Garlic Tip
Make sure the roasted garlic isn’t browned, mushy, or smelling funky—any one of these can be signs that the garlic has gone bad. Remember, when in doubt, throw it out. (Or compost it!)
Lastly, Freeze Roasted Garlic for a Few Months
To keep roasted garlic the longest, freeze it! You can:
- Remove each clove from the roasted head and place cloves into an empty ice cube tray. Mash a few cloves in each crevice until mostly flattened and stuck together. Freeze until firm, then pop out and use when needed.
- Freeze individual cloves on a plate or baking sheet. Once firm, place all frozen cloves into a storage bag. Freeze until needed.
- You can also just freeze the entire head of garlic, but that means you’ll have to thaw the entire thing to extract the number of cloves you need at that time.
Tools You Need
- Sharp Knife
- Oil Pour Bottle
- Baking Sheet
- Cutting Board
Our Favorite
Garlic Recipes
I Clove You!
Doesn’t a good (okay, bad) pun just make you smile? 🙂 Just know that I (c)love and appreciate you! Let me know what you think of learning how to make roasted garlic. I truly can’t wait to hear all about it. ‘Til next time…
Sending you all my clove and maybe even a dove, xo Demeter ❤️
🧄 📸 🧄
📸 Did you make this roasted garlic recipe? Take a pic and share it on Instagram with the hashtag #beamingbaker & tag @beamingbaker. I’d love to see it! 📸
How to Roast Garlic
Ingredients
- 3 heads of garlic
- 1-2 tablespoons extra virgin olive oil
- Salt and pepper to taste, optional
Instructions
- Preheat the oven to 400°F.
- Peel off the outer layers of papery skin on the garlic head—stop just short of removing so much that the garlic head falls apart. You want the garlic head to be intact.
- Trim off the tops of each head of garlic, cutting off about ¼ to ½”. This will expose the inner sections of each garlic clove.
- Set a large sheet of foil onto a baking sheet. Press and curl up the edges, creating a little bowl with extra room to fold it closed later. Be careful not to tear any holes into the foil.
- Place trimmed garlic bulbs into the center of the foil.
- Drizzle garlic with olive oil, then use your fingers to rub the oil into the cloves. Optionally, sprinkle with salt and pepper to taste.
- Press the tops of the foil bowl together, creating a closed pouch, being careful to keep the foil from touching the garlic, and keeping garlic heads upright.
- Place the baking sheet into the oven.
- Bake the garlic for 45-65 minutes, or until golden on top and deeply fragrant. Mine took 55 minutes.
- Remove baking sheet from the oven and carefully open the foil pouch to avoid steam burns. Tip: Use heatproof tongs to open the foil pouch.
- Trim the edges of the skin to create an opening with which to scoop out the roasted garlic. Enjoy!
Notes
More Easy Recipes
- Asian Salad Dressing
- Pesto Pasta Salad
- Roasted Potatoes and Carrots
- Cheese Quesadilla Recipe
- Pineapple Salsa
Like this recipe? Share it with friends!
Did you make this recipe? Take a pic and share it on Instagram with the hashtag #beamingbaker & tag @beamingbaker. I’d love to see it!
This post may contain affiliate links, which allow me to make a small commission for my referral, at no additional cost to you.


This was such a helpful guide to roasting garlic perfectly every time! Definitely bookmarking this and will be coming back to it often!
Woohoo! I am so pleased you found this helpful! 🙂
This is such a handy recipe as we need roasted garlic for every dinner. I love how evenly roasted these are.
So happy to hear it, Seema!
This was such an easy recipe that does not disappoint! Such a great way to add a burst of flavor to boring recipes; delicious!
Yep, nothing spices up a recipe like some fresh roasted garlic. 😋
This is so good spread on crusty french buttered bread. My favorite snack!
Oh, I am all about this on bread!
This is the easiest way to roast garlic ever! And the foil pouch leaves a lot less mess!
Exactly! I am all about keeping mess to a minimum when it comes to cooking.