This post may contain affiliate links. Please see our disclosure policy.
This peanut butter granola bars recipe is so EASY! The best no bake peanut butter granola bars recipe without honey, that tastes just like honey roasted peanuts.
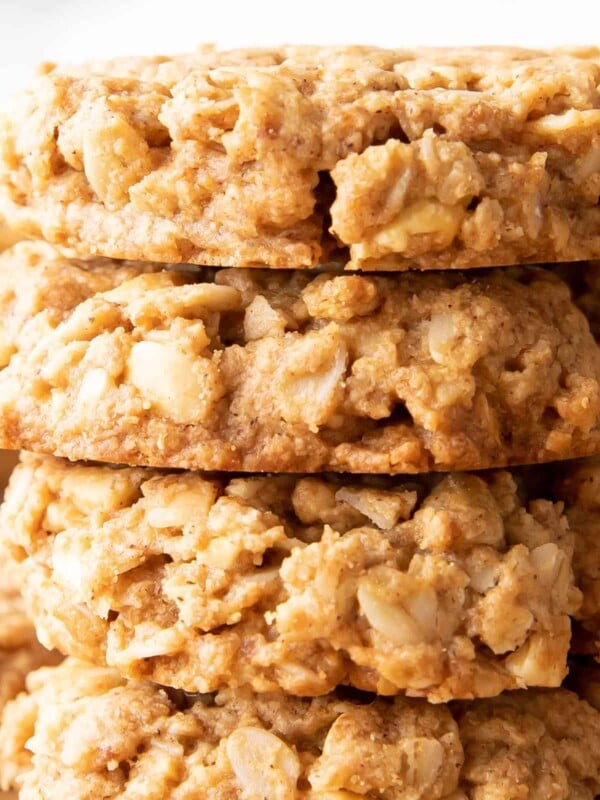
Try the cookie version here.

Peanut Butter Granola Bars
How do I take a tried ‘n true snack and make it even better? That’s what I asked myself when I started working on this peanut butter granola bars recipe.
The answer? Make these peanut butter granola bars with the fewest ingredients possible, dramatically decrease prep time, and make them impossibly delicious.
Wanna see how these no bake peanut butter granola bars are all that and more? Let’s make this!
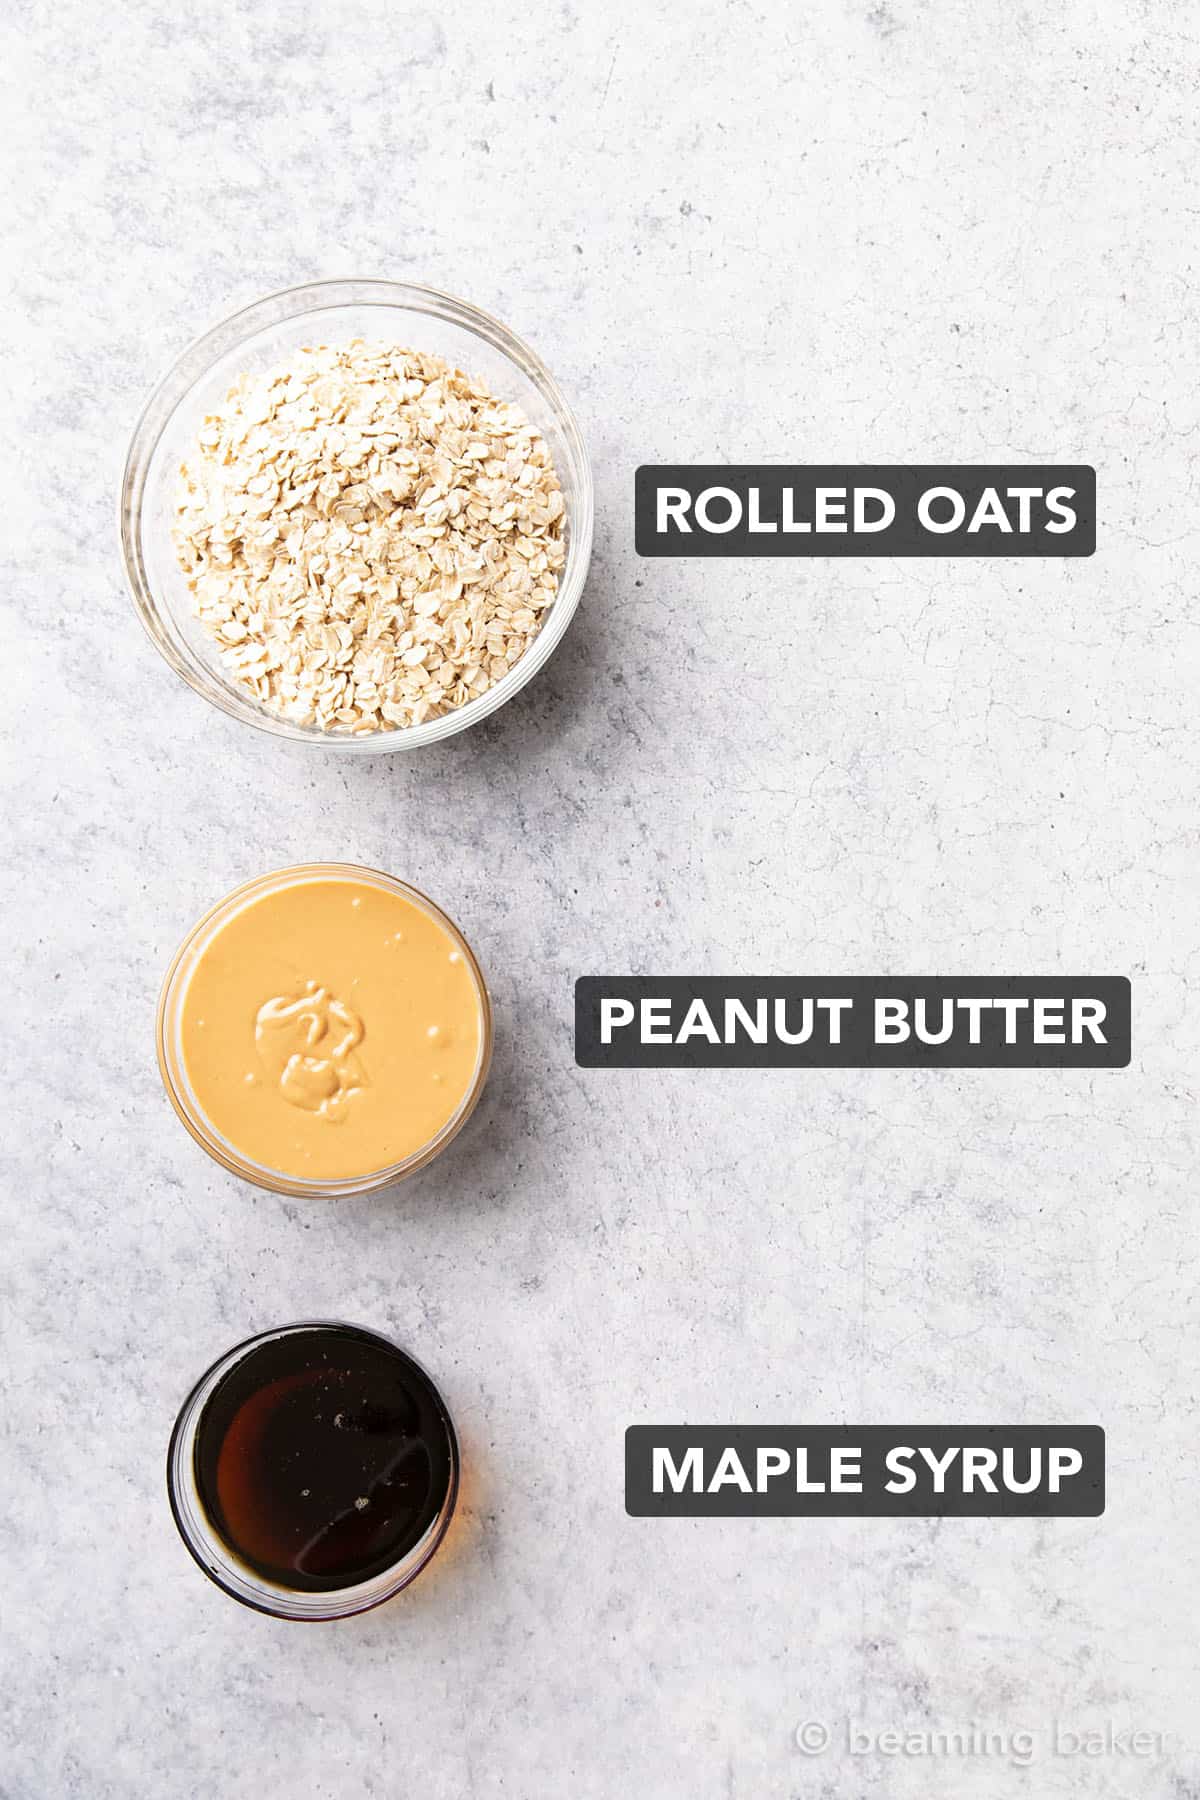
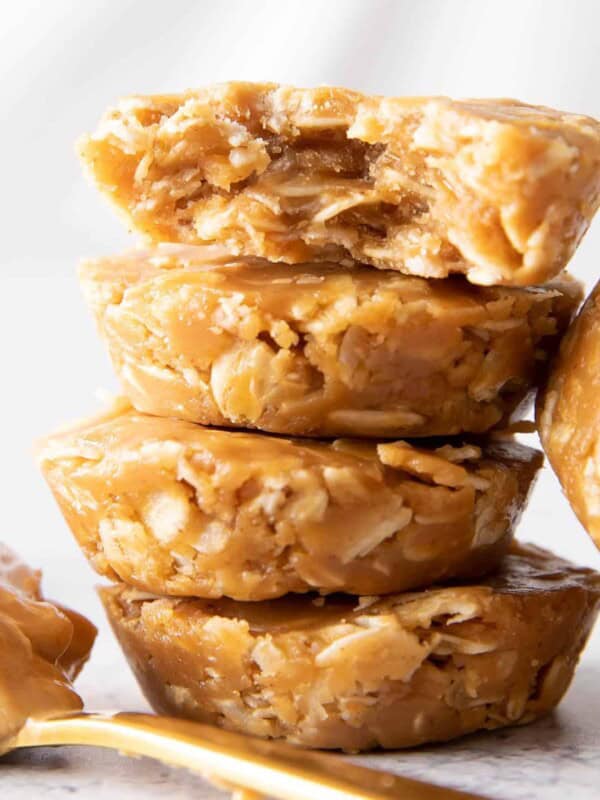
3 Ingredient No Bake Peanut Butter Granola Bars
Can it be any easier? My homemade peanut butter granola bar recipe only requires 3 ingredients: all vegan, gluten free & healthy! Check it out:
- Peanut Butter
- Rolled Oats – gluten free if needed 😉
- Pure Maple Syrup
How to Make Peanut Butter Granola Bars
Learn how to make peanut butter granola bars the easy way, then let me know what you think! 🙂
Line a baking pan
Line a square baking pan with parchment paper or wax paper. Set it aside for later.
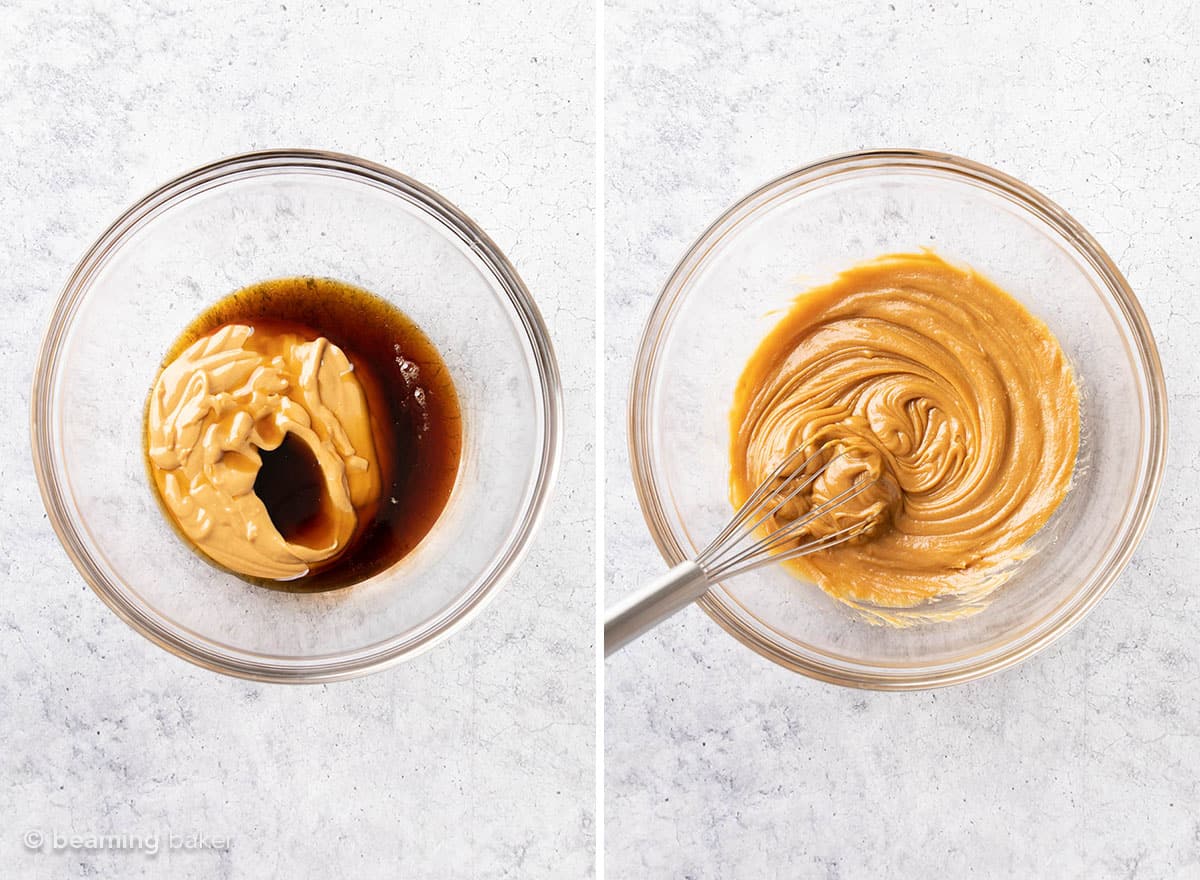
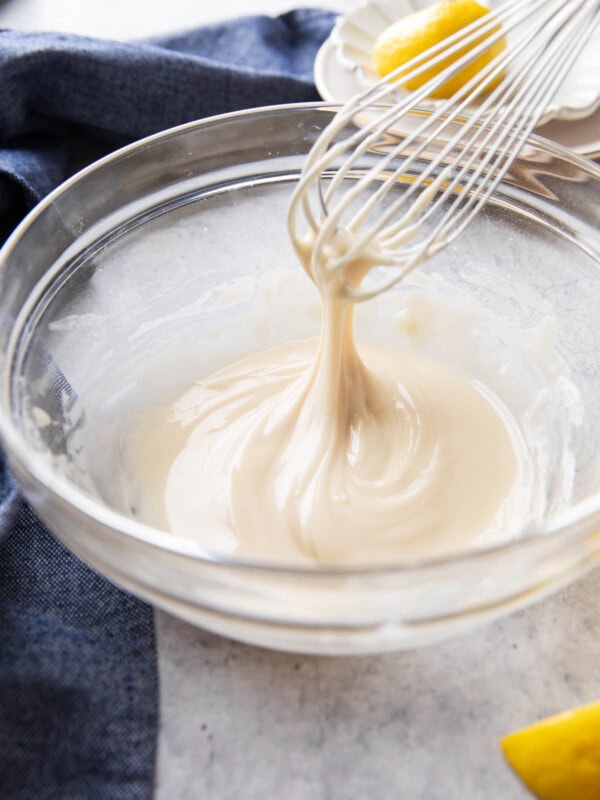
Make the peanut butter mixture
Add peanut butter and maple syrup to a mixing bowl. Then, whisk the two ingredients together until thickened. This is your sweetened peanut butter mixture!
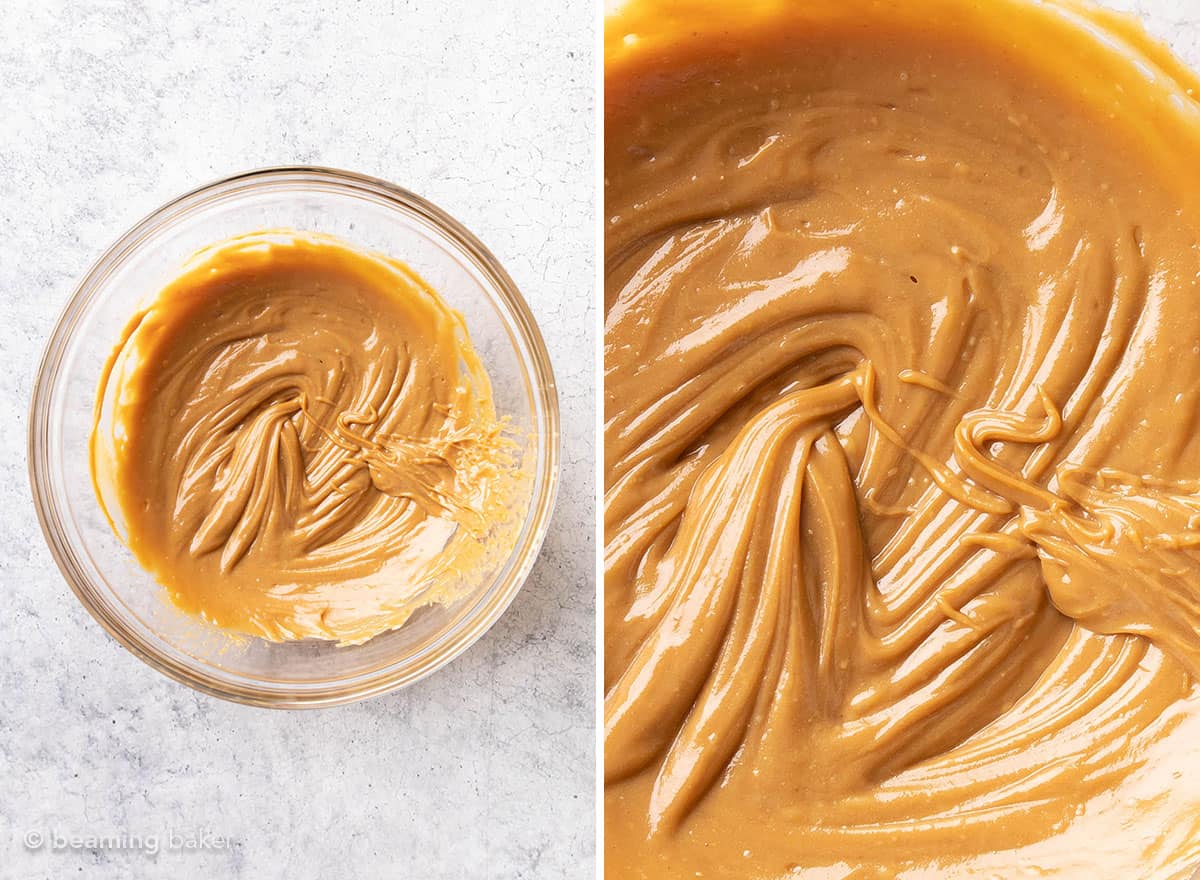
Heat until warm
Heat the bowl of sweetened peanut butter until warm and just a few bubbles form.
Look for just a small amount of tiny bubbles to cook the syrup and peanut butter together—not to worry, this isn’t a super finicky thing. You just want to warm the two ingredients cohesively together because it will be the glue for your granola bars. Mine took 4 rounds of 30 seconds each.
Add oats
Add oats to the warm, sweetened peanut butter mixture. Use a rubber spatula to fold it all together to create the dough for your peanut butter granola bars.
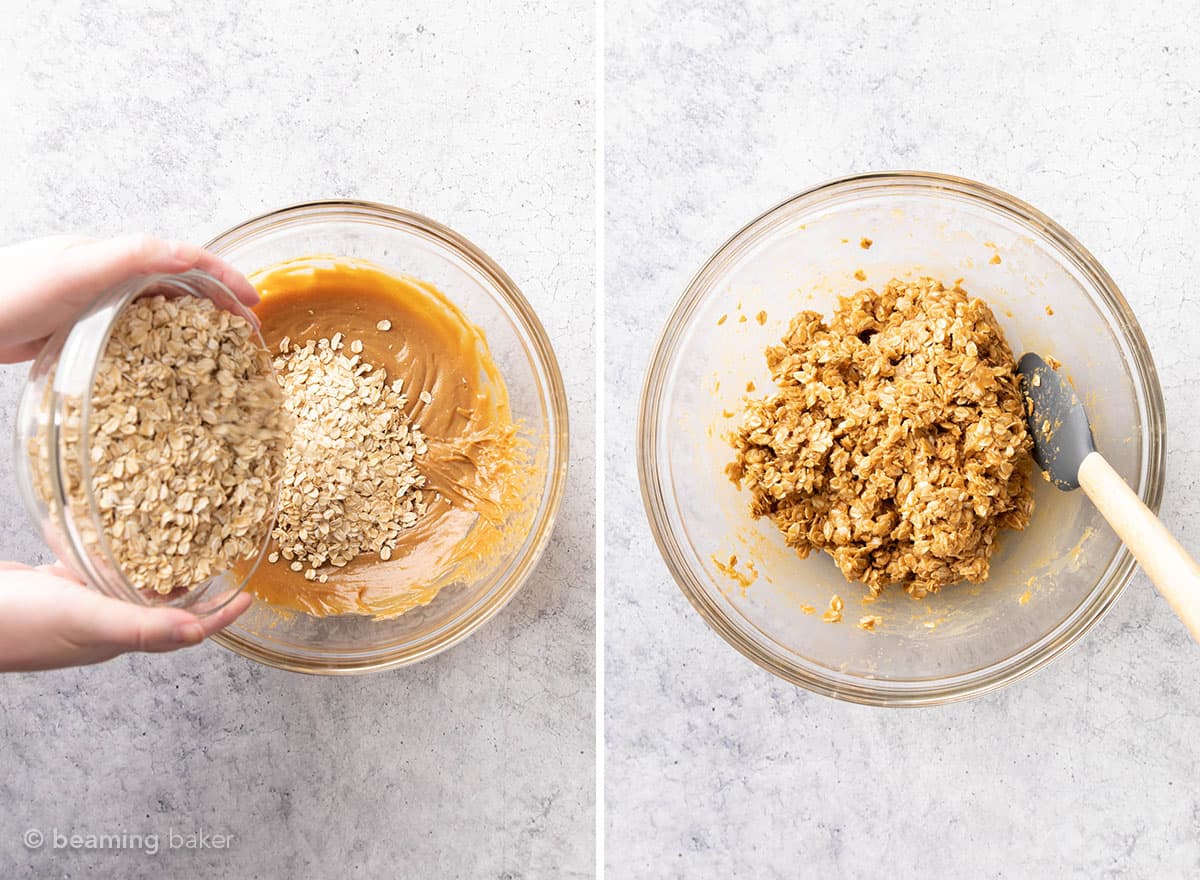
Check out the texture in this peanut butter beauty!

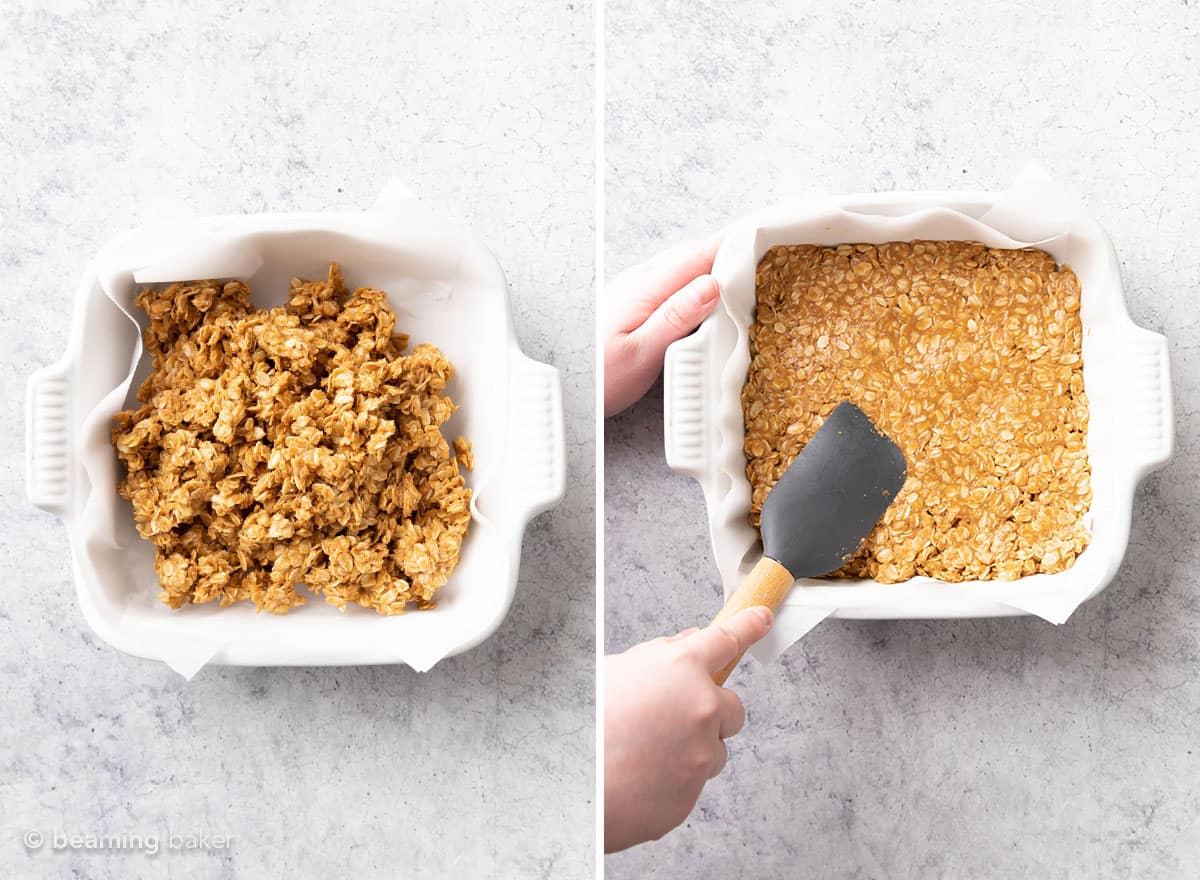
Pour granola bar mixture into the pan
Transfer this granola bar mixture into the lined pan you set aside earlier. Using a rubber spatula, press down and smooth into an even layer.
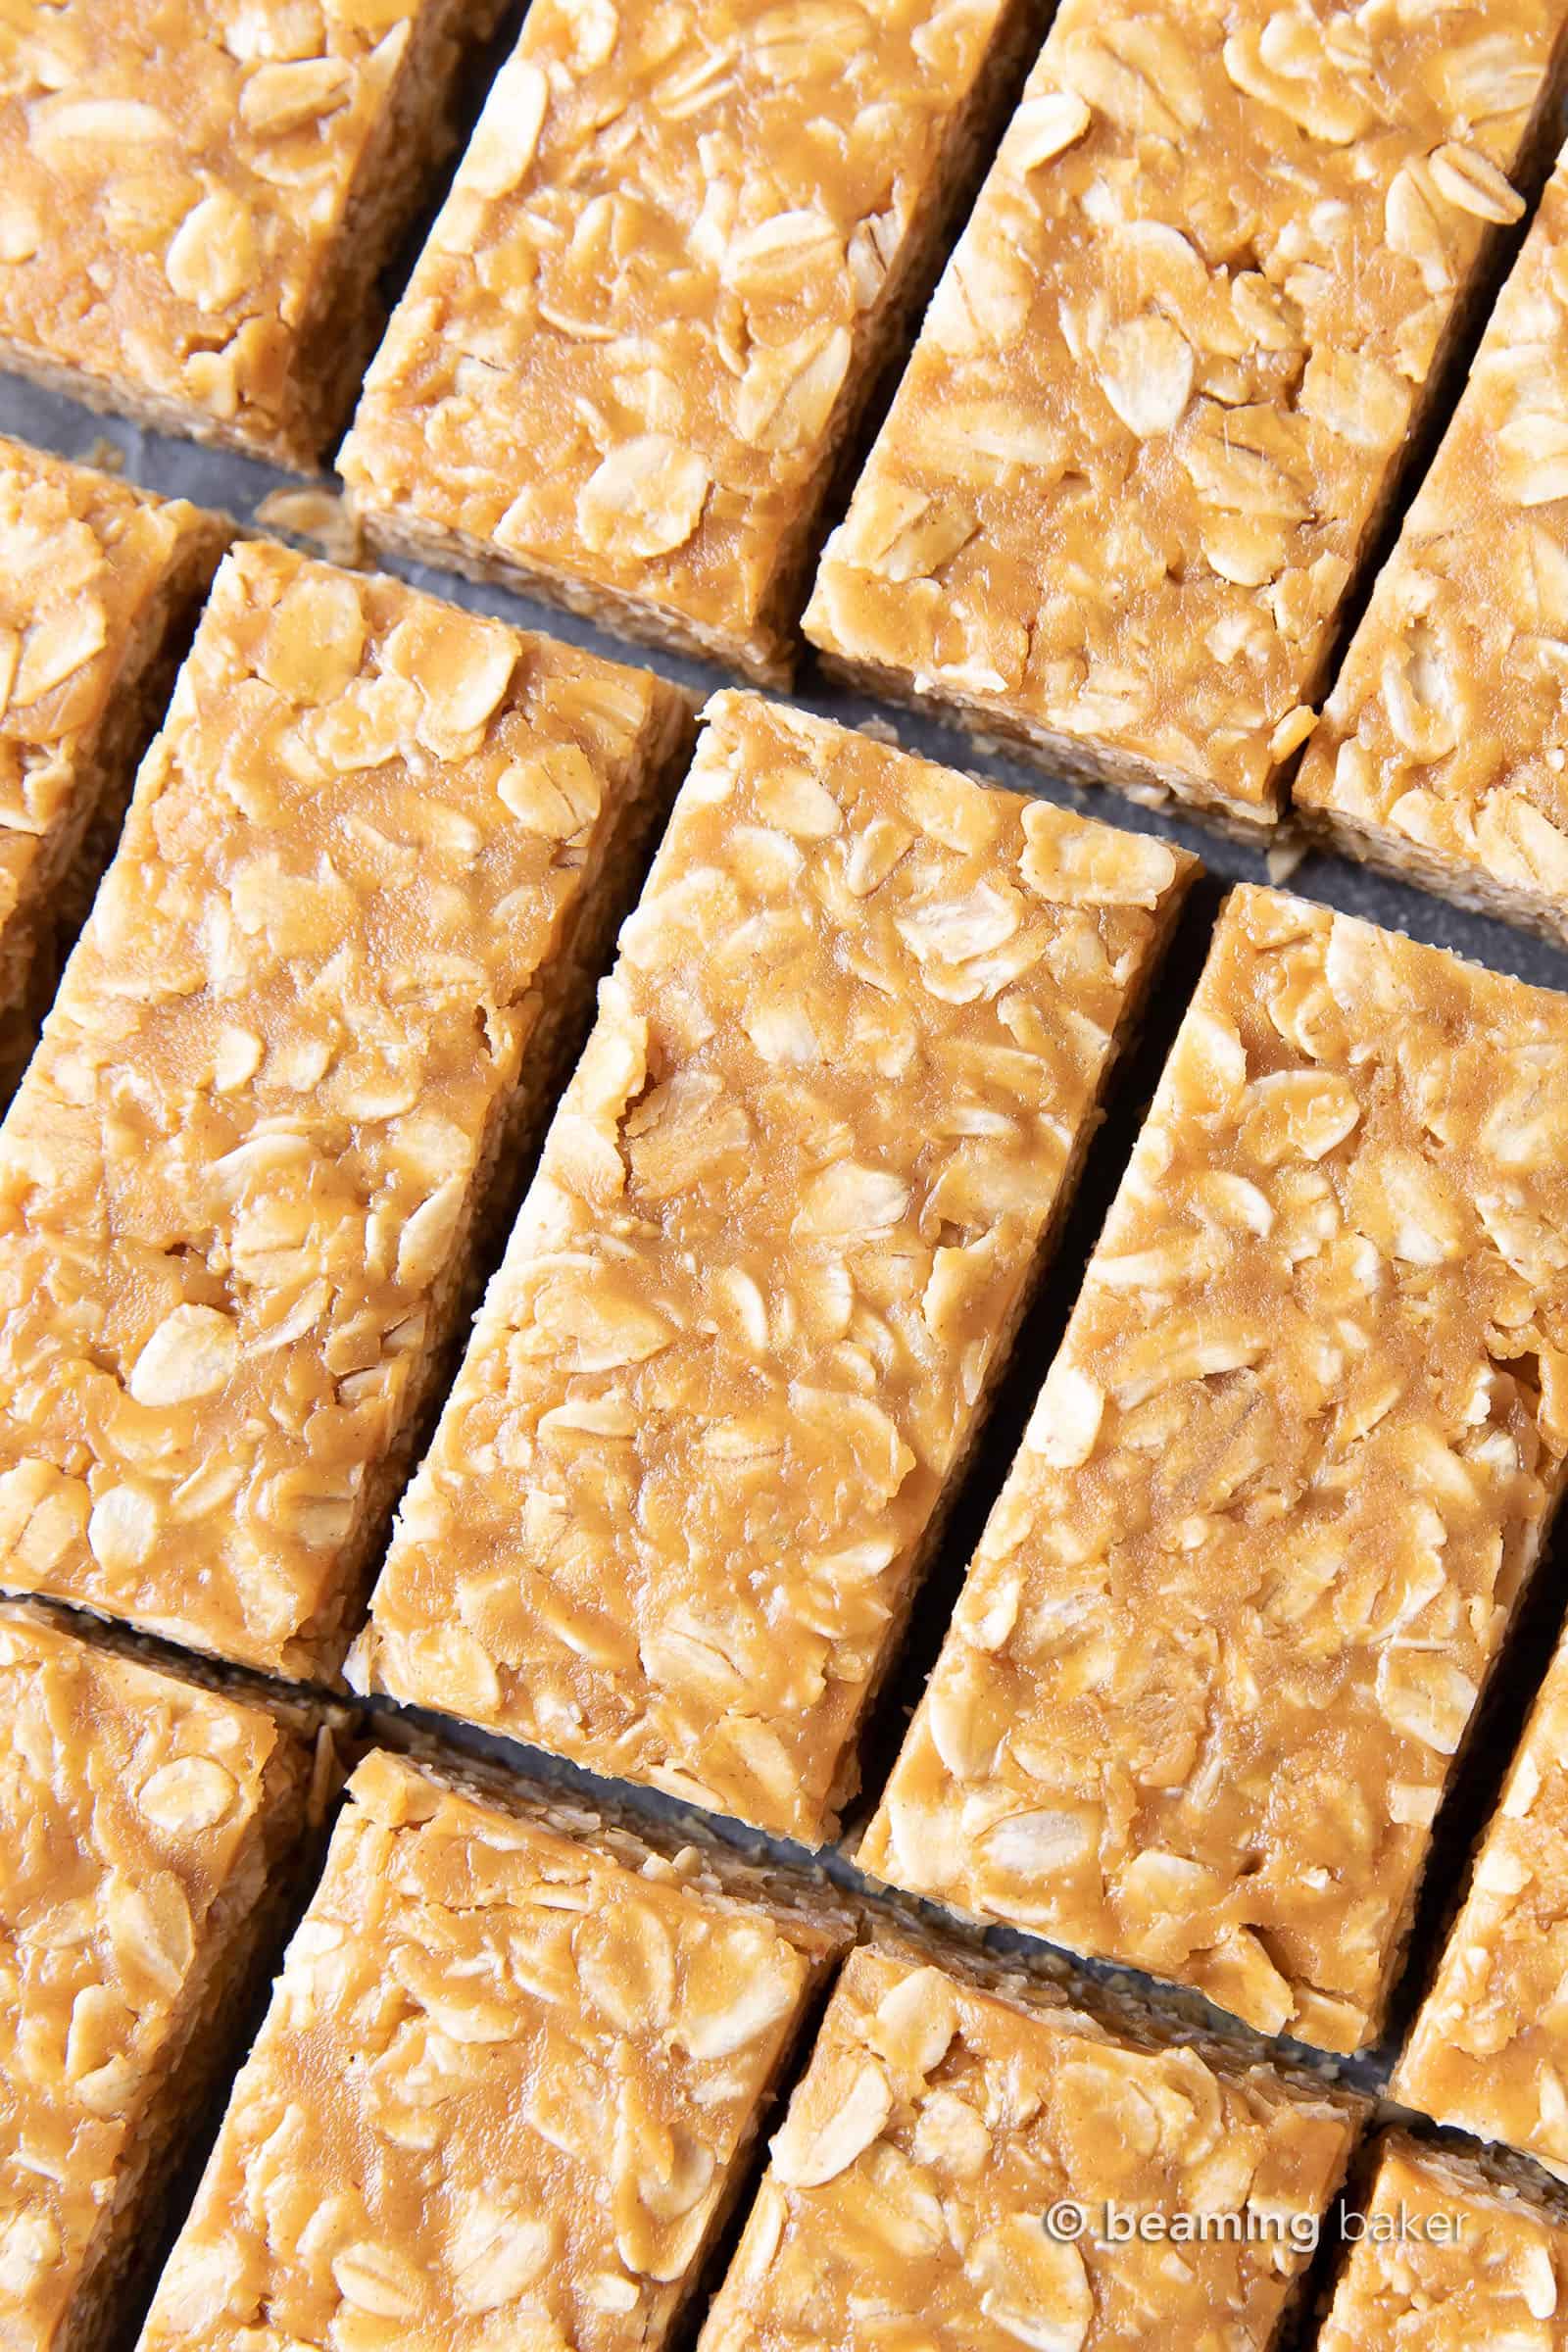
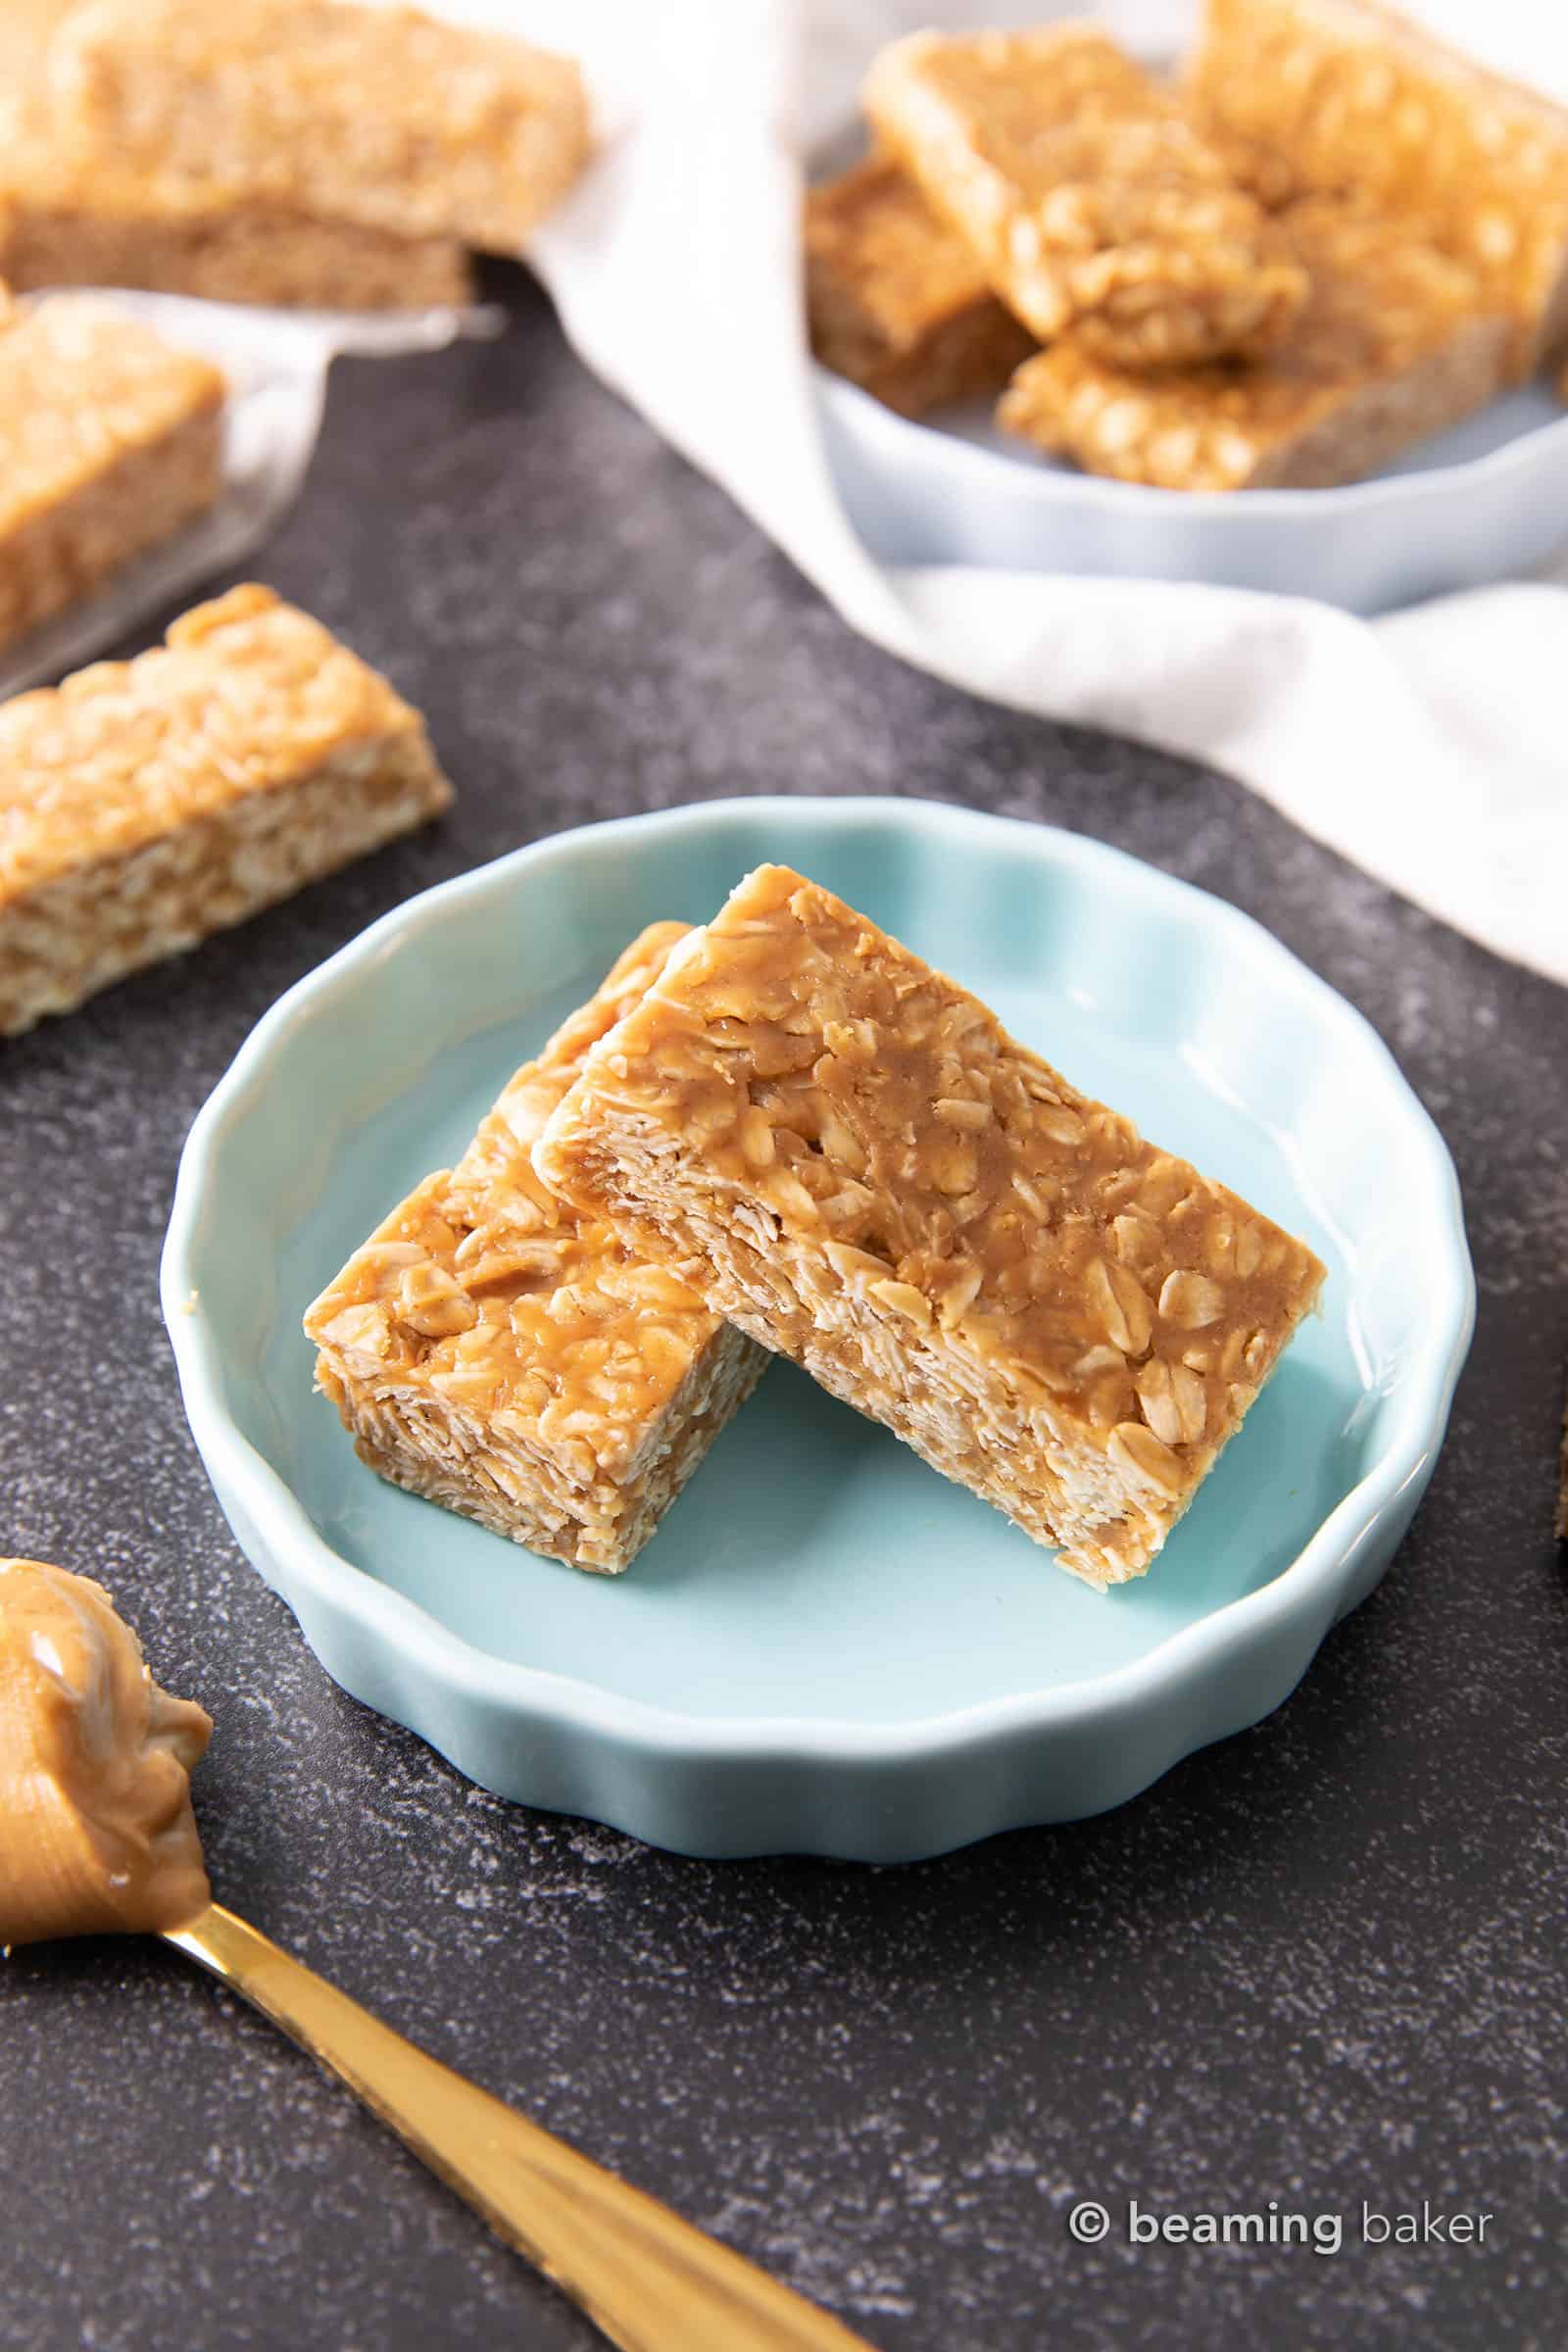
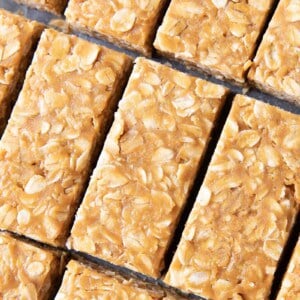
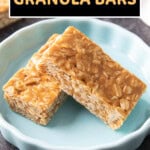
Chill, Slice, and Enjoy!
Chill the pan in the freezer until firm. Then, slice and eat the very best peanut butter granola bars! And don’t forget to… enjoy! 🧡
TL;DR: Homemade Peanut Butter Granola Bars
My 3 Ingredient No Bake Peanut Butter Granola Bars are:
- super easy to make, ready in minutes
- deliciously firm and chewy, satisfyingly thick
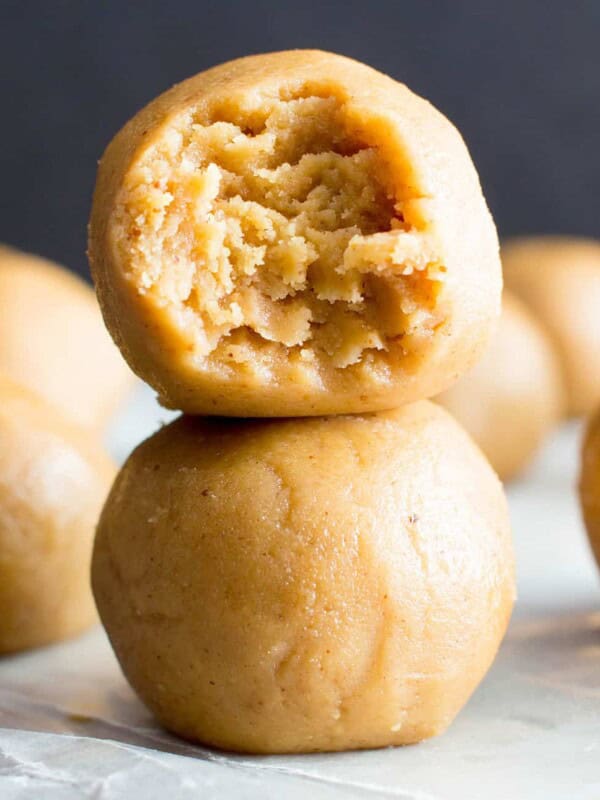
- made with just 3 ingredients (like these amazing 3 Ingredient No Bake Peanut Butter Oatmeal Cookie Cups and these Cereal Bars Recipe.
- satisfyingly nutty and sweet, like honey-roasted peanuts
- bursting with gluten free oats
- made with deliciously healthy ingredients
Sending you lots of love…
I’m so happy about creating delicious, homemade treats with you. I can’t wait to hear what you think. ‘Til next time…
Sending you all my love and maybe even a dove, xo Demeter ❤️
Peanut Butter Recipes
Also try my family-favorite peanut butter granola.
3 Ingredient No Bake Peanut Butter Granola Bars (GF)
Ingredients
- 1 cup smooth peanut butter
- ½ cup pure maple syrup
- 2 ½ cups gluten free rolled oats
Instructions
- Line an 8-inch square baking pan with parchment paper or wax paper. Set aside. You can also use a granola bar pan set on a small cookie sheet for stability. Clear some space in the freezer for this pan—you will need it later.
- In a medium, microwave-safe bowl (large enough to add oats later), add peanut butter and maple syrup. Whisk together until well mixed. Heat in 20-second increments in the microwave until warm, fragrant, and bubbles begin to form. Whisk in between heating increments. *Stovetop instructions in Notes.
- Add oats to the peanut butter mixture. Using a rubber spatula, stir and fold until thoroughly combined. Pour this mixture into the prepared baking pan. Using the rubber spatula, smooth into an even, tightly packed layer. If using a granola bar pan, evenly distribute mixture into the crevices in the pan. Using a small spoon, press down into a very tightly-packed layer.
- Freeze for 25-35 minutes, or until firm and completely chilled. Slice into 18 bars (3 columns by 6 rows), or release bars from granola bar pan. Enjoy! Storing instructions below.
- ★ Last Step: If you made this recipe, leave a comment and review. It truly helps our small business keep running and it helps readers like you!
Notes
Nutrition
Nutrition information is automatically calculated, so should only be used as an approximation.


There are few things I love more than no bake AND 3 ingredient recipes! Will be making these guys- yum!
Yeah!! Me too! If I hear the words “no bake” and “3 ingredients”, you KNOW I’m there! Enjoy!
I cannot believe how easy these granola bars are to make!
Right?!? Couldn’t be easier! 😉
These bars look amazing! And just 3 ingredients?? Sounds like my kind of treat. Love that they are vegan too.
Thanks Michelle! Hope you enjoy!
These Granola Bars looks so delicious! I love that they only include 3 ingredients.
Thanks so much! They’re too easy to make! Hehe!
I test-drove a half recipe in an 8×4-inch loaf pan. Very easy to make, and not expensive for us as we make our own maple syrup. (First World problem, I know!)
Oh my! My husband loved these bars and said the grandkids will think they are a great cool treat at the beach this summer.
After cutting, I stored in the fridge.
Yay! I’m so happy to hear that the bars are such a hit Joyce! . Wow, homemade maple syrup? What a treat! Sounds like you and the grandkids will have a super fun summer!
Do you know if this would work with honey instead of syrup?
Hi Ariana, yes, that would work! I know of other readers who’ve tried that and liked it. Enjoy!
How much does 1 bar weigh in grams? Important
Yum!!
I added half a cup or so dairy free chocolate chips and a cup of honey roasted peanuts and used honey instead of maple syrup as that is what I had.
I love the flexibility of your recipes. Thank you!!!
Loving all the subs Jennifer, they sound like such a tasty combo! Thank you for the kind words–it means a lot! 🙂
I didn’t freeze mine. I left them in the counter overnight and they came out great. I added chocolate chips to mine.
Fantastic Anna! And the addition of chocolate chips sounds just delish. Happy no-baking! 🙂
I now make these every week for my family. I add raisins and cereal that is going stale. Easy, delicious, love it!
Oh gosh, what a great idea to use up that soon-to-be stale cereal! So happy that you love my recipe. Enjoy! 🙂
These were delicious! I wrapped each one in a little wax paper so they wouldn’t get messy on the kid’s hands. Fantastic and simple recipe:) Thanks for sharing.
So glad you and your little ones enjoyed these, Finnley! 🙂 Thanks for stopping by!