This post may contain affiliate links. Please see our disclosure policy.
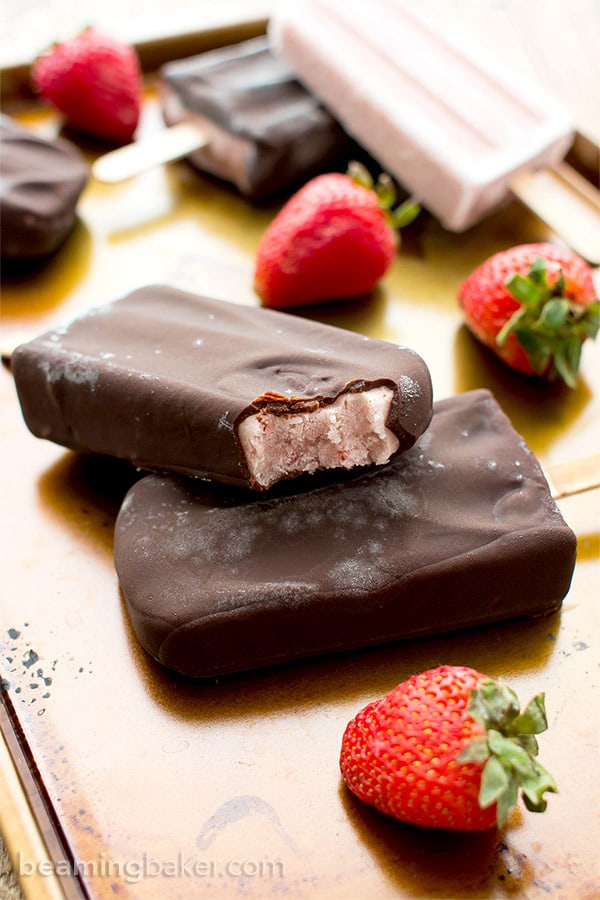
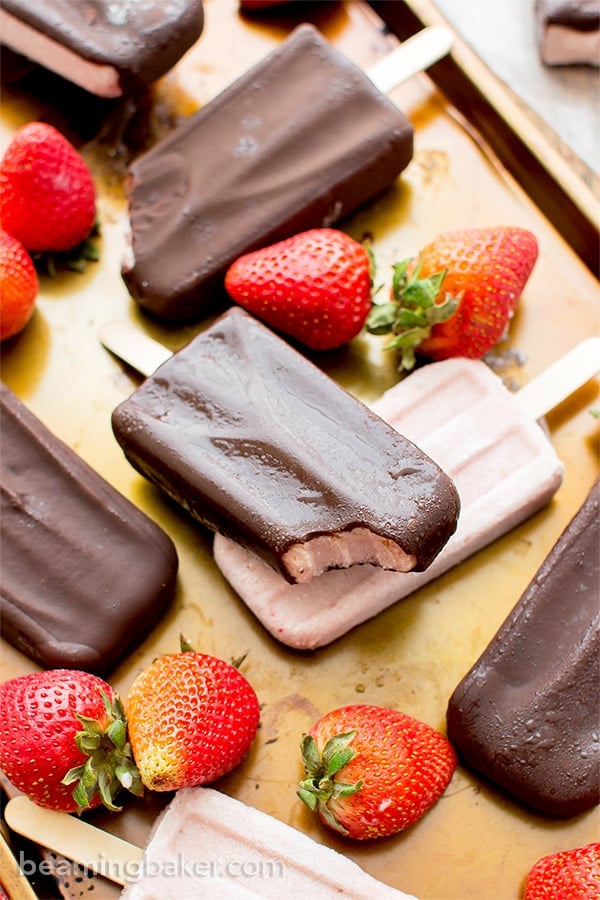
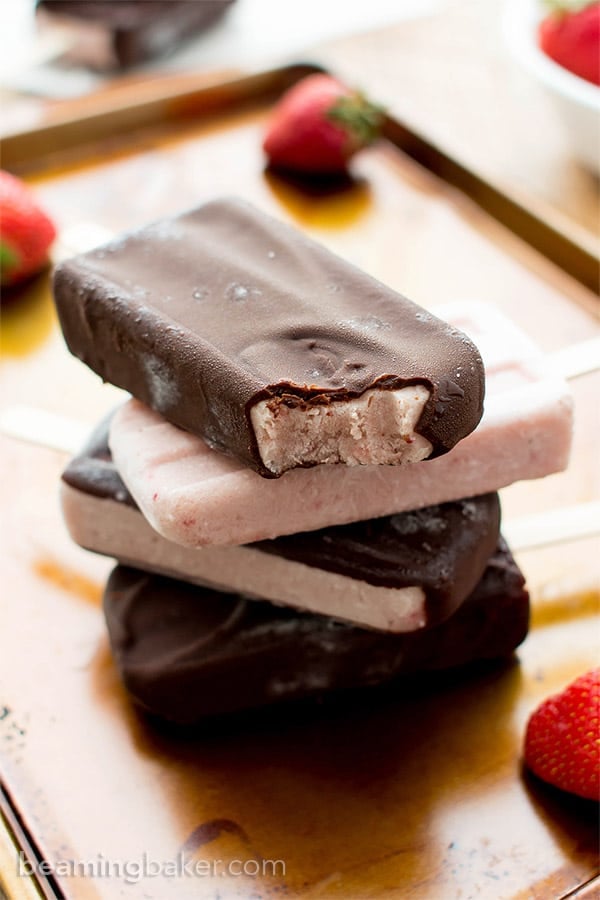
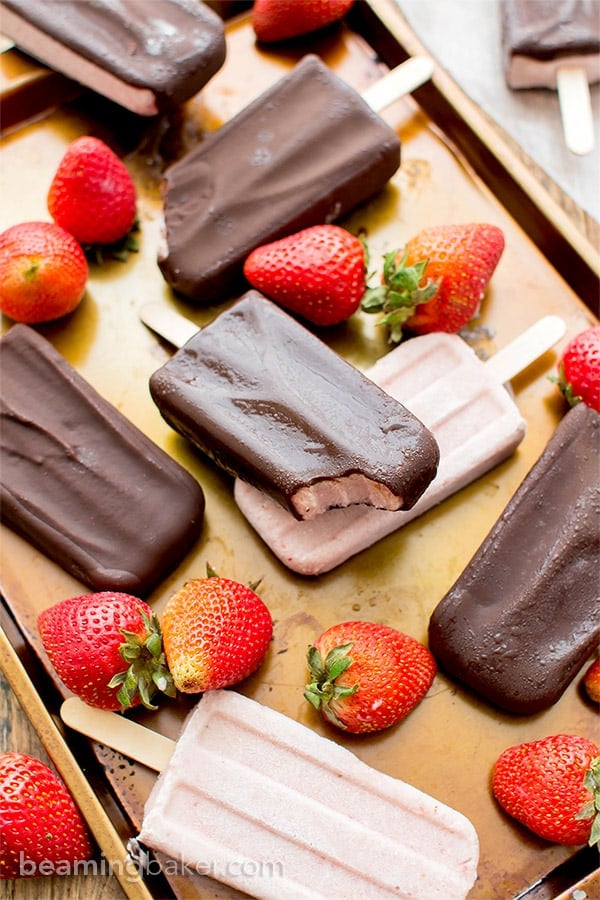
Chocolate-covered Strawberry Ice Cream Bars (V+GF): a 6 ingredient recipe for amazing ice cream bars that taste like chocolate-covered strawberries. Vegan, Dairy Free, Paleo, Gluten Free.
By now, you know what a HUGE dork I am. If not, Hello, nice to meet ya. I’m a dork. If I had realized much earlier in life the epic levels of my dorkiness, much awkwardness could have been avoided. Or not, because –> dork.
This might be one of many reasons why I “matured” the way I did in college. Back then, I was playing at this whole adult business and just trying to figure life out. No biggie. Meanwhile, plenty of over-the-top shenanigans ensued. Including, but not limited to, my idea of adults having legit hospitality manners or whatever it’s called. Note to self: If you don’t even know what it’s called, then you’re probably not doing it right. Plus, dork. ‘Nuff said.
So there I was, at the tender age of 19, moving into my second year of college. I fancied myself an adult and even had a credit card. I was attending Mount Holyoke College and having a bit of a ball being all independent and such.
I started hanging out with new groups of people and even visiting them in their dorm rooms. Like, woah. I know. 😉 I even started venturing out to nearby campuses (hey, Amherst!) and taking classes there. On one such occasion, I had super fancy plans to meet up with a friend to check out his piano. Make that an electric piano. Uh-huh.
So I figured, it’s a hot day, he enjoys chocolate chip ice cream. Why not bring over a lovely, hospitable gift of ice cream? But instead of picking up a nicely portable pint of that good stuff, or a handy (and properly insulated) container of homemade strawberry coconut sorbet, I decided on something much less practical.
An ice cream cone. With not one, but, wait for it… TWO scoops of ice cream.
So I used my fancy-schmancy credit card that came with a free t-shirt to go buy me some ice cream. I proudly carried that tentative double-scoop on its rudely narrow ice cream cone. I started my long (yeah) walk to his dorm room. Things went pretty smoothly at first. I was bobbing my head along to Massive Attack, thinking about how on-point (or “rad” at that time) my bright red cowl neck top and chandelier earrings were.
Side note: I sure do miss how skillfully tortuous those chandelier earrings were on my paper-thin earlobes.
With every bob of my head, I felt a small drip of moisture on the hand clutching the cone. Like any adult, I had, of course, responsibly wrapped the cone in a few napkins. There shouldn’t be any issue with a few drips, right? The napkin would catch it all. Or something…
After Teardrop ended, I looked down at the cone. Before the song, the top scoop had been standing proud and pert, covered in those awesome ridges only ice cream has, and frozen as all get out. After the song, the scoop was considerably less proud, perhaps even feeble, smooth and melty, like it couldn’t even remember what ridges were. And not frozen. Not frozen at all.
No biggie, I thought. It’ll make it. His room’s only one curvy hill away. With this screaming red cowl neck sweater on (now dotted in light flecks of ice cream), nothing can stand in my way! I started making my way up the hill when the strap to my messenger bag slipped off. I elegantly tipped my body to the side to wiggle it back up.
Plop.
Squish.
I looked down. A round, wavy-edged circle of creamy white ice cream lay perfectly content on the dark splash of bumpy gray pavement. It looked so comfortable being there; as if its life was always meant to be this way. Tableaued on the pavement.
As I continued staring, the melty sphere slowly and caressingly sluiced it way south, beginning its descent down the hill. It left a trail of nearly transparent, foamy ice cream as it made its way happily down.
Okay, I can still handle this. The world is still my oyster today. At least that’s what my Cosmo astrology reading said for today. I still have one scoop left. And being a for-realsies adult now, I am dedicated and steadfast in my commitment to bringing this gift to my friend.
And so I continued on my way up that hill, white dots of ice cream flecked across my bright red cowl neck, messenger bag halfway down my body, smile a tad strained. Maybe even with my hair sweaty and pasted against my forehead in the most attractive manner.
I walked and walked, congratulating myself on sticking to it. Congratulating myself on deciding not to wear my super cute copper-sparkle ballet flats–and thus destroying them.
Just four steps away from his dorm building, I felt a swoosh of wind blow my hair to the side. At least the parts that weren’t glued to my forehead with sweat. I gripped that cone like my life depended on it. Then, a bump.
I stumbled and the final scoop of ice cream dropped as if in slow motion to the ground. By now, the only part that was still frozen was the size of a marble. So in reality, half of the scoop had already melted to the bottom of the cone. The other half just made its slow, mud-like descent down to new ground, which no ice cream had previously conquered.
So there I stood, with one soggy waffle cone, covered in ice cream (me and the cone). Hair glued to the side of my head, hand gloved in a sticky layer of ice cream, cowl-neck now added to my Never Buy Again list, eyes frantic like a madman.
That day, I decided to never buy ice cream as a guest-giving gift ever again. And to never buy another cowl neck. Also because they’re so goshdarn floppy. I also decided, one day, I would make a vessel for ice cream that would allow us to enjoy it, free of the sartorial disasters that may come upon our on-point outfits for the day. And it would be delicious.
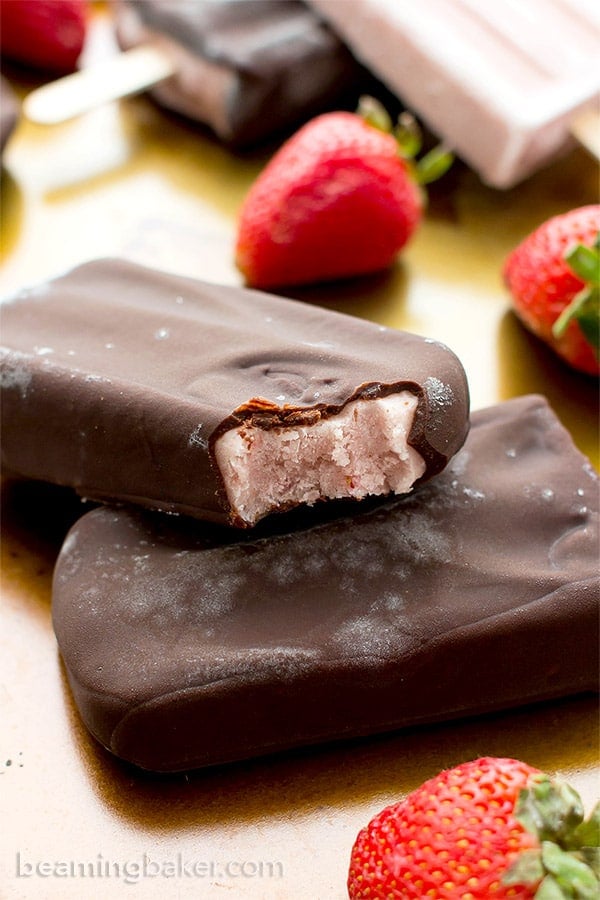
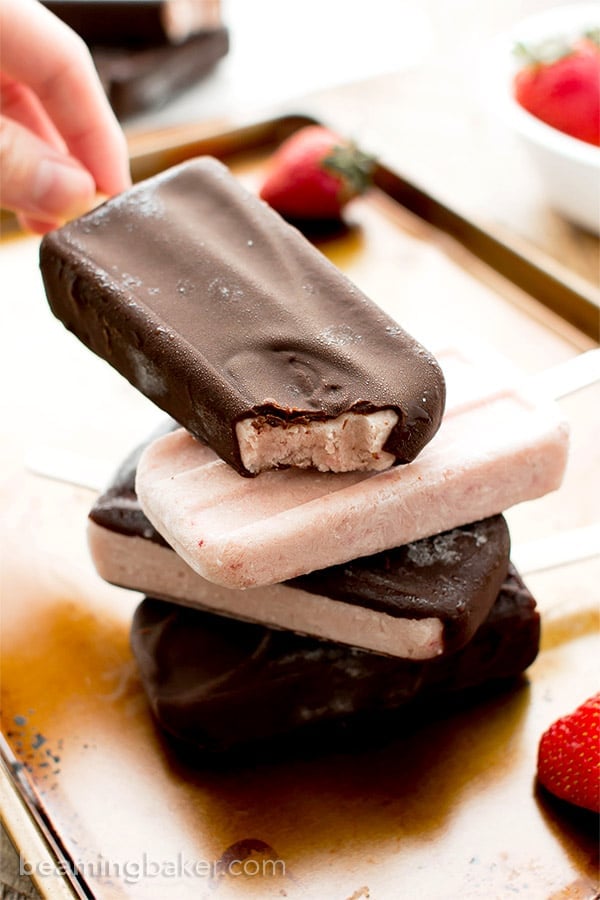
So welcome to the solution my 19-year-old self would have loved: Chocolate-covered Strawberry Ice Cream Bars. Made with a nice, thick shell of chocolate. Partly to protect your clothes, partly for its deliciousness, and completely to keep your sane during the summer.
These chocolate-covered strawberry ice cream bars are not only adapted from my favorite recipe of all time, but they also don’t require you to wear a cowl neck sweater or heavy-as-a-bowling-ball chandelier earrings to enjoy them.
My dear, much less dorky, friend, check it out, these Chocolate-covered Strawberry Ice Cream Bars are:
- made with just 6 ingredients
- unbelievably delicious, fresh and rich
- vegan, gluten free, dairy free and paleo
- taste just like a chocolate-covered strawberry, but better
- yup, I said it
- plant-based and allergy-friendly
- wonderfully simple, with an ingredients list you can feel good about
- designed to protect your clothes from ice cream annihilation
- fruity, chocolatey and even more y’s I can’t even think of right now
I invite you to make a big batch of these chocolate-covered strawberry ice cream bars. If you simply love chocolate-covered strawberries, or even strawberry ice cream topped with chocolate shell, this recipe is perfect for you. Whip up a batch, plan your next picnic and take a day off work. It’s time for you to treat yourself. Sending you all my love. xo
☀︎ Click below to Pin ☀︎
☀︎ Did you make this recipe? Take a pic and share it on Instagram with the hashtag #beamingbaker and tag @beamingbaker. I would love to see it! ☀︎
SHOP THIS RECIPE
[amazon_link asins=’B0002IBJOG,B008J8MJIQ,B000MMKPEC,B000QSTJYO’ template=’BB-ProductCarousel’ store=’beamingbake0c-20′ marketplace=’US’ link_id=’6c02c03f-68b8-11e7-ba10-afe115504bb7′]
Here are a few items I used in today’s recipe. 🙂
Popsicle Mold | Coconut Milk | Popsicle Sticks
Food Processor | Blender | Maple Syrup
Chocolate-covered Strawberry Ice Cream Bars (Vegan, Dairy Free, Paleo, Gluten Free)
Ingredients
Strawberry Ice Cream Bars
- 2 medium bananas, sliced and frozen
- 1 can full-fat coconut milk, 13.66 oz.
- 1 cup frozen strawberries
- 2-3 tablespoons pure maple syrup
Chocolate Shell Coating
- ½ cup melted coconut oil
- ½ cup pure maple syrup
- ½ cup unsweetened cocoa powder
Instructions
- Make the ice cream bars: Add bananas and coconut milk to a blender. Blend until smooth, scraping down the sides of the blender as needed. Add strawberries and maple syrup. Blend until smooth, again scraping down the sides of the blender as needed.
- Pour this strawberry mixture into a popsicle mold, leaving about ¼” of space at the top of the mold to allow the popsicles to expand in the freezer. Insert popsicle sticks, or follow instructions for your mold.
- Freeze for 6-8 hours.
- Remove from freezer. Line a large baking sheet with wax paper or parchment paper. Clear some space out in the freezer for this sheet.
- If needed, allow ice cream bars to thaw for a few minutes. Optionally, run popsicle mold under a bit of lukewarm water to loosen the bars. Place the popsicle mold on a flat surface and wiggle the bars out.
- Lay the ice cream bars evenly spaced apart on the prepared baking sheet. Freeze for 1 hour, or until completely frozen. This allows the bars to harden for smooth dipping.
- Make the chocolate coating: About 10 minutes before the bars are done freezing, prepare the chocolate shell coating. In a medium bowl, whisk together the coconut oil, maple syrup and cocoa powder. Whisk until thickened and smooth, like melted chocolate.
- Make the chocolate-covered ice cream bars: Prepare your work area. Lay a large sheet of wax paper or parchment on a flat surface. Remove the bars from the freezer. Pour about 1/4 cup of chocolate mixture directly onto the prepared work surface. Using a rubber spatula, scrape the chocolate into a rectangular shape that’s larger than one ice cream bar.
- Lay the bar on top of the chocolate rectangle. Press down, then pull back and up, coating from the bottom of the bar to the top. You will have coated one side and the top of the bar. Tilt the bar to the side, coating an edge in chocolate. Repeat for the other edge. Flip the bar over, pressing the uncoated side in chocolate. Pull back and up, finishing off the coating. Use a spoon to seal up any areas that aren’t coated. Return the chocolate-coated bar back onto the prepared baking sheet.
- Pour more chocolate mixture onto the work area, using the rubber spatula as needed to scrape it into a rectangular shape. Repeat until all ice cream bars are coated in chocolate.
- Enjoy!* Storing notes below.
Notes
- Wrap bars in wax paper or parchment. Store in an airtight container in the freezer for up to 1 week.
- Adapted from my Strawberry Coconut Milkshake, Strawberry Coconut Popsicles and Vegan Ice Cream Bars. All vegan, dairy-free and gluten-free.
- More recipes for your popsicle mold (all v, gf, df): Chocolate Peanut Butter Banana Popsicles, Blueberry Coconut Popsicles, Strawberry Chia Seed Popsicles.
© beamingbaker.com. All content and images are protected by copyright. Please do not use my images without my permission. If you wish to republish this recipe, please re-write the entire recipe using your own words and include a link to this post for the recipe.
My favorite recipe of all time. Try my Vegan Ice Cream Bars (Dairy Free, Gluten Free, Paleo).
Craving some wonderfully refreshing strawberry popsicles? Try my Vegan Strawberry Coconut Popsicles (Dairy Free, Gluten Free, Paleo).
Simply irresistible. Check out my Gluten Free Vegan Brownies (V, GF, Dairy Free). All made in just one bowl.
This post may contain affiliate links, which allow me to make a small commission for my referral, at no additional cost to you. Thank you for supporting Beaming Baker.




do they taste like banana? thanks!
Hi Abbie, these bars do have a hint of banana flavor–but since there are a lot of other strong flavored ingredients here, including the chocolate and coconut, you get a tasty mix. Hope you get to try them! P.S. The less ripe the bananas, the less you’ll taste them (but the less sweet this recipe will be).
I’m pretty sure you made it further than I would have with that cone – I can be a total klutz! & I probably would’ve forgotten the napkins!! Ha ha, Demeter! These bars are awesome – especially since this is one of my favorite flavor combos!
Lolol. No, I’m pretty sure you would have gone further than me. Haha. You may have underestimated my klutzyness. Is that how you spell klutzyness? Hahah. The napkins definitely saved *some* of the day! 😉 Thanks so much Megan! Hope you have a nice weekend. Muah!
Hahaha, oh Demeter – you are so funny! Also I’m glad you are in the dork club with me, because it’s really more fun here. And you went to Mount Holyoke!?! That was on my wishlist. But it was not to be. Much like your ice cream cone. I’m glad you made us these ice cream bars, because honestly, they are way better than an ice cream cone anyway.
Thanks M! 🙂 Let’s toast to being in the dork club together. Yep, I went to Mount Holyoke–but just for two years, then transferred to UCSB. It was quite the ball. It would have been so funny if we had met there! 🙂 Glad you enjoyed the post, my friend. xxo
Haha – Oh Demeter, I so wish I could have helped your 19 year old self back then – though, you might not have appreciated the help I was willing to offer. See, my idea of “help” at the first sign of vertical shrinkage of that double scoop would be to offer to lick that whole second scoop off so it didn’t throw itself all over ya! But – I have this extraordinarily uncanny ability to totally tune out when I eat ice cream and my “help” would have urned into me eating both scoops AND cone and then snapping out of my trance to find your face the same shade as that cowl neck…hmmm… thinking your plan of encassing said ice cream in a thick chocolate shell is way better than mine… though from my point of view – both options are win-win 🙂
XOXO
Hope you are having a wonderful week! And – did I miss the post about your sister’s wedding – or did I misread that post about the weekend of your sister’s wedding?
Lololol. Ya know though, at least *someone* would have eaten it. Assuming the pavement doesn’t count as a someone. Hahaha. Shashi, you and I would have been quite the goofy duo, that’s for sure! 😉 Me sweating and spilling ice cream, you tuning out the whole world, in an ice cream trance. Lol. Shashi, you totally didn’t miss it! I’m gonna be sharing pics in upcoming posts. 🙂 Much love to you my friend. <3 xoxo
These look amazing Demeter! I can never get my chocolate smooth like that so never make these yummy frozen deserts that you do.
Thanks Julie! 🙂 It’s totally doable–after a few tries! 🙂
Hey, haven’t you heard that dorky is the new cool? Especially because you are sooooooo funny! Imagine if you weren’t a dork (just like me), we would have no funny stories right now. What would you blog about? 😀
Okay, maybe about these super awesome ice cream bars, which BTW are pretty much perfect. But still, even ice cream bars are better with funny stories 😉
Lolol. Okay, so I’m “cool” now. Interesting… I’ll take it! Shoot, did I just spill something on my shirt in my exuberance? 😉 Lol. Yay, we can be dorks together! You’re right, I would have nothing to blog about. Like, at all. Haha. Ice cream bars are definitely always better with stories. 🙂 Thank you, E! xo
What a fun story and the way you write your stories is amazing! I never get an ice cream cone, just don’t like them! I just made chocolate covered ice cream bars, but they are not as healthy as yours! These look gorgeous! Will definitely try them!
Aw, thanks Mira! That means a lot to me. 🙂 You don’t like ice cream cones? I never knew that! 🙂 Then these would be perfect for you! Enjoy! 🙂
Another absolutely delicious ice cream popsicle recipe! I can’t believe how simple these are to make with few ingredients, yet they look so impressive! Strawberry ice cream + chocolate = LOVE! 😉
Aw, thanks Marsha! 🙂 I’m embarrassingly proud of the fact that they’re made of so few ingredients–so thank you twice over! 🙂 I was hoping you’d like these, and I’m so glad that you do. 😉
Haha.. This story is really funny 🙂 I love reading your posts and your pics are treat to watch. This ice cream looks awesome. I am in love with the ingredients here.
Thank you Kushi. 🙂 I’m so happy that you enjoyed the post!
I have the hardest time not darting down to the comments section like 12 times during your posts! Things keep popping in my head, so many little nuggets to laugh about or relate to or ask you. I think that’s why I always end up with gargantuan comments when they do finally happen. I’m working on it lol:D I’ve decided it’s your use of vocabulary and incredibly life-like descriptions that make you such a masterful storyteller. Yep, killing it on the descriptions. I feel like I was there holding a soggy cone right beside you. I will even put on a cowl neck shirt, I’m pretty sure i have one of those annoying things somewhere. So maybe it was disastrous, but in terms of the phrase “it’s the thought that counts” you win for best gift ever!! That is some serious ice cream delivering dedication you demonstrated there 😀 Now I need to make a whole batch of these beautiful pops, trek across town with it, and then enjoy it fully appreciating how perfect a carrying vessel for ice cream chocolate really is!
Okay, but same here! That’s why (geeky confession time), I have a virtual sticky note to keep by the window of your post while I’m reading. 🙂 That way, I can comment as I go. 😉 Yes, I am THAT cool. I think we’re both guilty of these gargantuan comments, but I do like to think of them as short conversations, if you will. 🙂 I’ll go ahead and play it fast and loose with the term “short.” Lolol. Ohmigosh, do NOT put on a cowl neck. Not unless you’d like to! That flappy neck part will go straight into your ice cream. Haha. Can’t wait to see the IG post of you trekking across town with said ice cream carrying vessel. Lolol. Thanks Natalie! It’s always a pleasure chatting with ya. 🙂